Operations with Tenants
This section describes all operations that a Host user can perform with Tenants.
Create a new Tenant
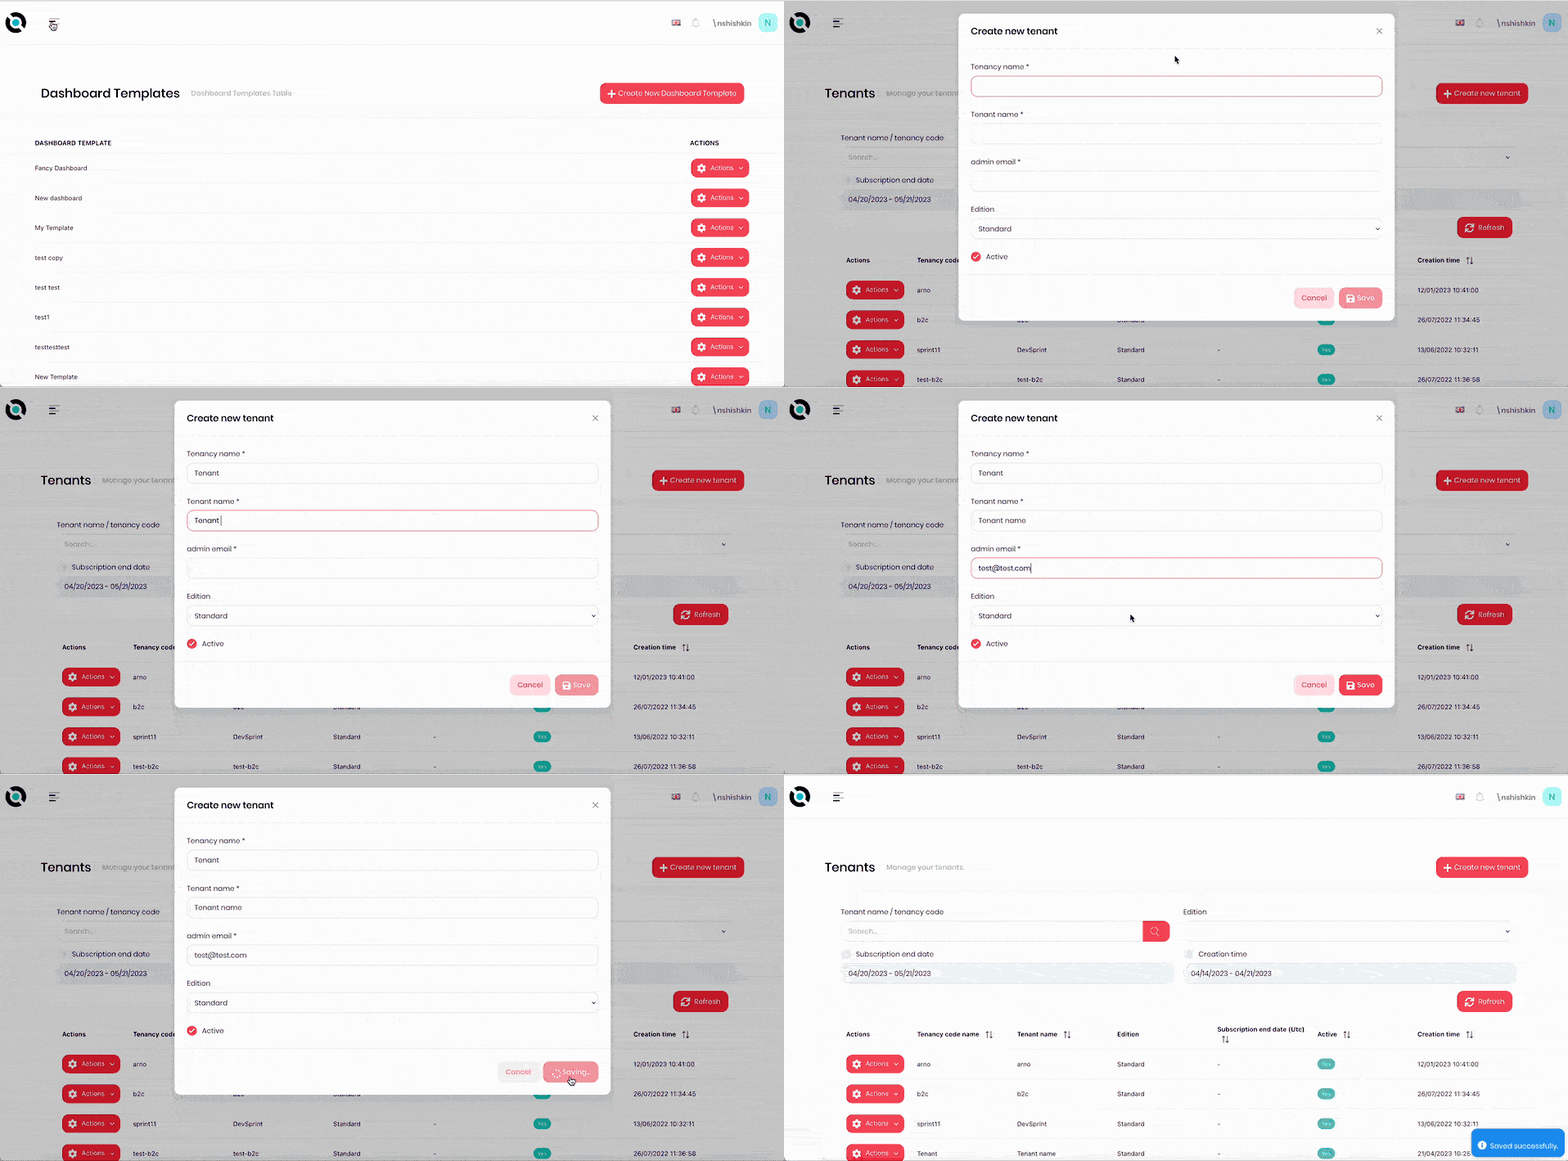
- Click the hamburger menu in the top-left corner.
- Select Tenants.
- Click Create New Tenant.
- Enter the tenancy name (unique code for your Tenant) in the Tenancy name field.
- Enter the tenant name (name for your Tenant) in the Tenant name field.
- Enter the email address of the admin user that you want to assign to this Tenant in the Admin email field.
- Skip the Edition field.
- Select the Active checkbox to make the Tenant active. Otherwise, do not select this button to keep the Tenant inactive.
- Click Save. The new Tenant will appear in the Tenants list.
Log in as a Tenant
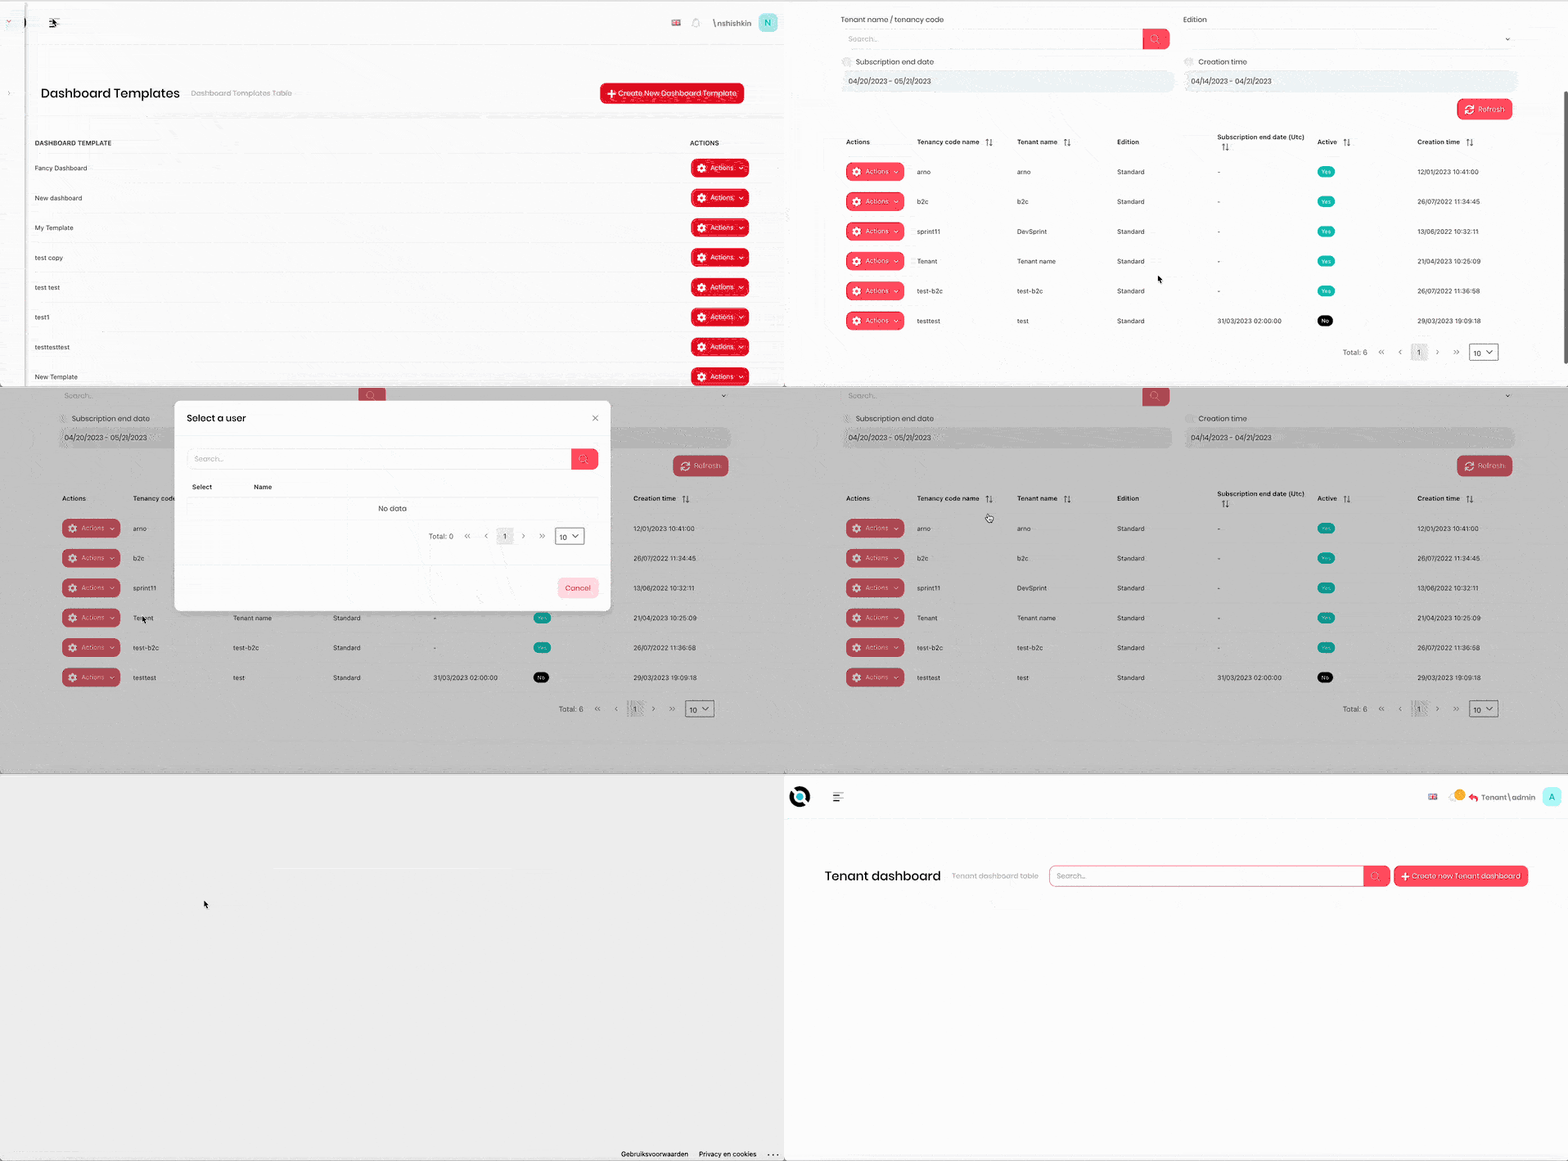
- Click the hamburger menu in the top-left corner.
- Select Tenants.
- Click Actions next to the tenant that you want to log in as.
- Select a user of this tenant that you want to log in as by clicking the > button next to the user's name. You will be taken to the Tenants screen for this user.
Edit a Tenant name
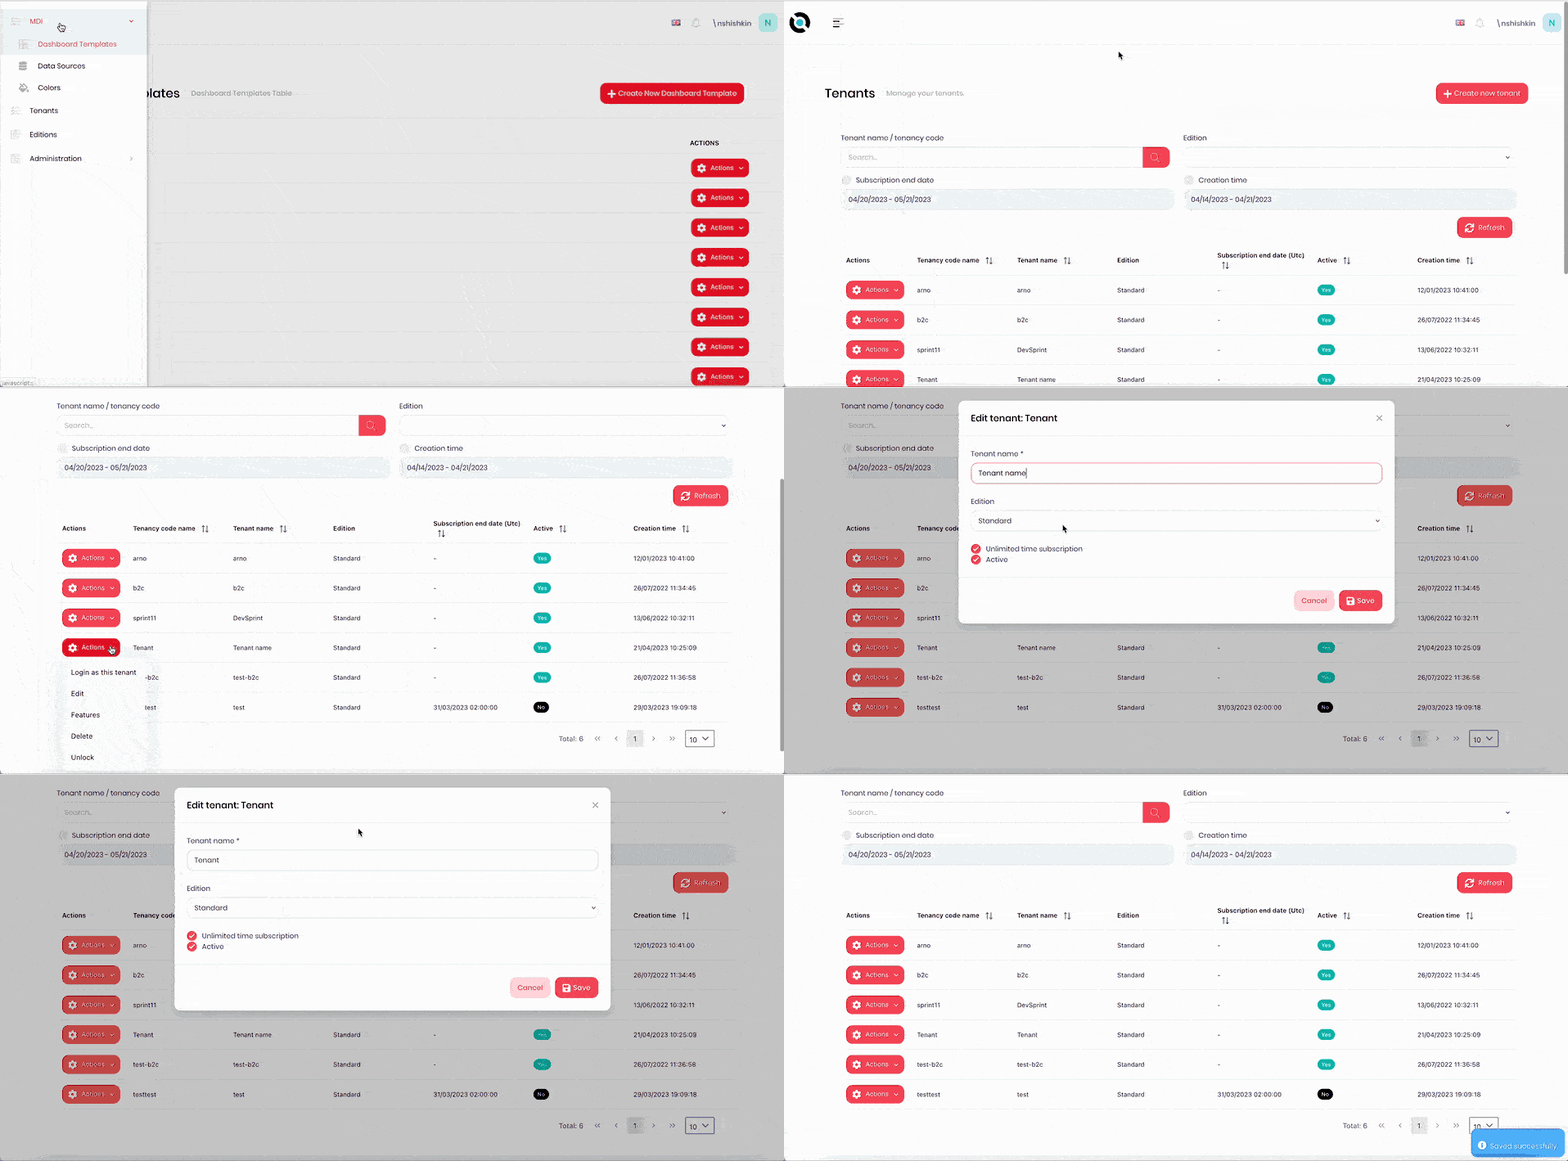
- Click the hamburger menu in the top-left corner.
- Select Tenants.
- Click Actions next to the tenant that you want to edit.
- Click Edit.
- Enter the new tenant name in the Tenant name field.
- Click Save.
Edit a Tenant's subscription end date
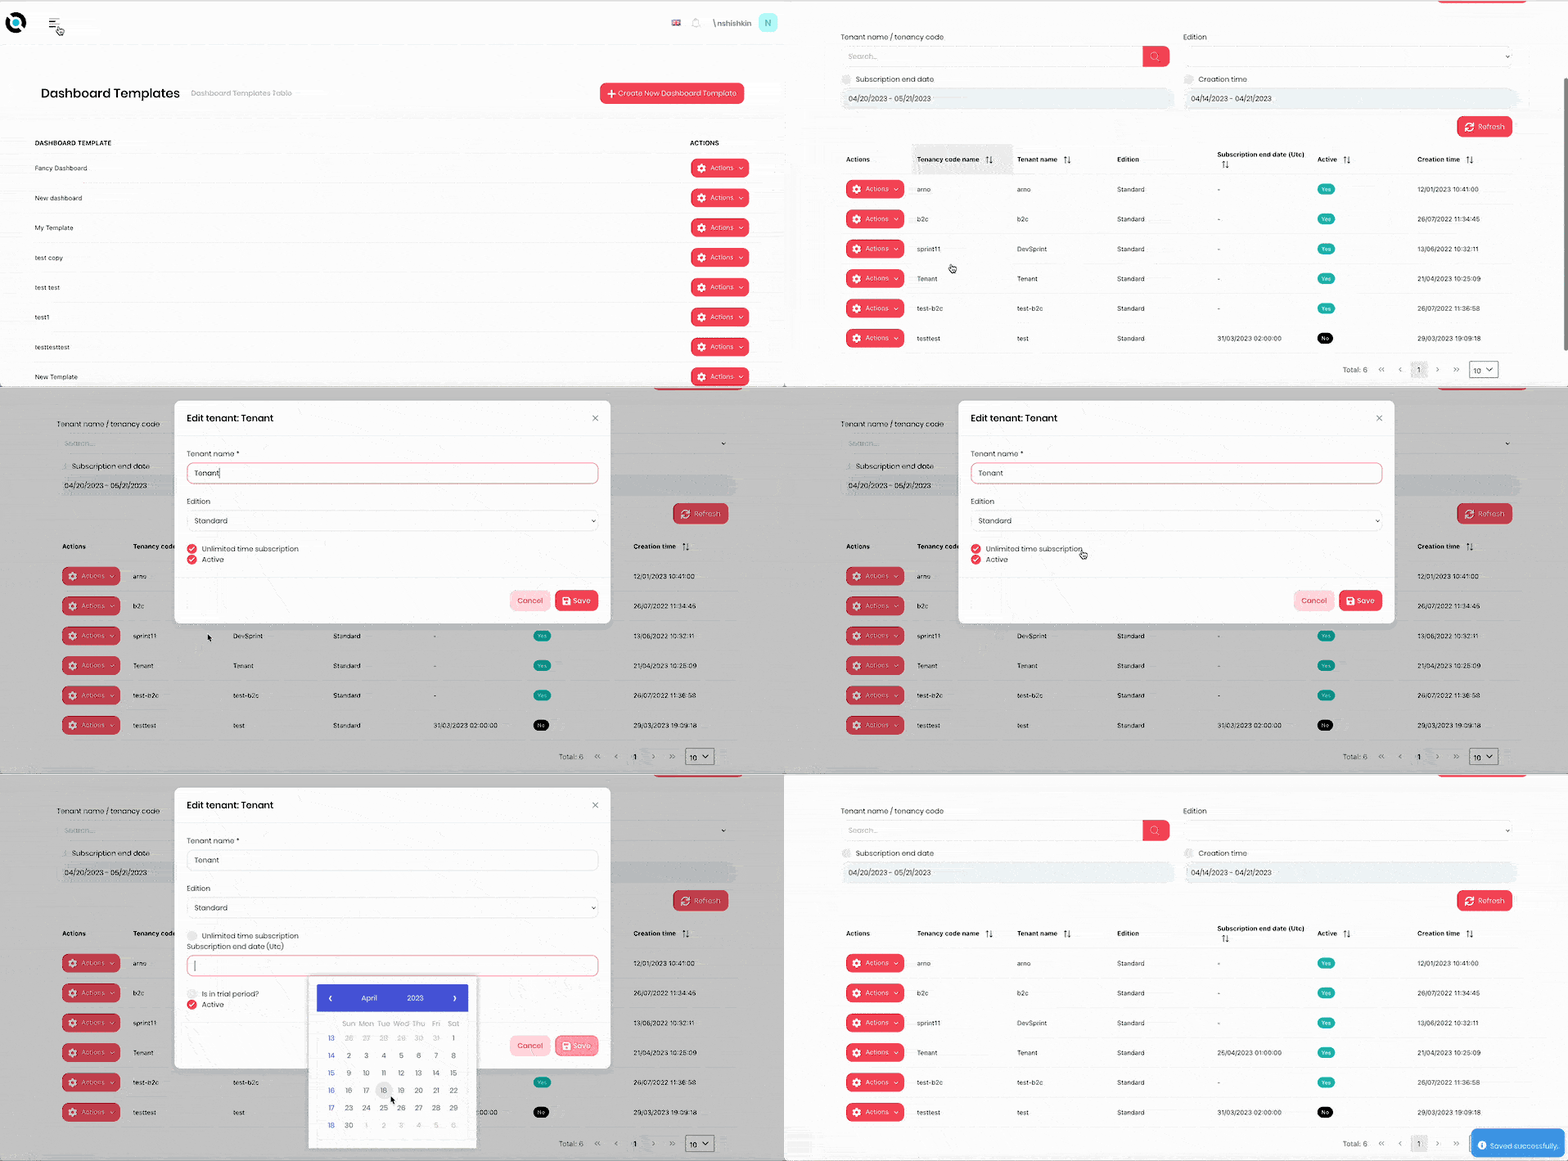
- Click the hamburger menu in the top-left corner.
- Select Tenants.
- Click Actions next to the tenant that you want to edit.
- Click Edit.
- Enter the subscription end date in UTC in the Subscription end date field, or select Unlimited time subscription.
- Click Save.
Activate/Deactivate a Tenant
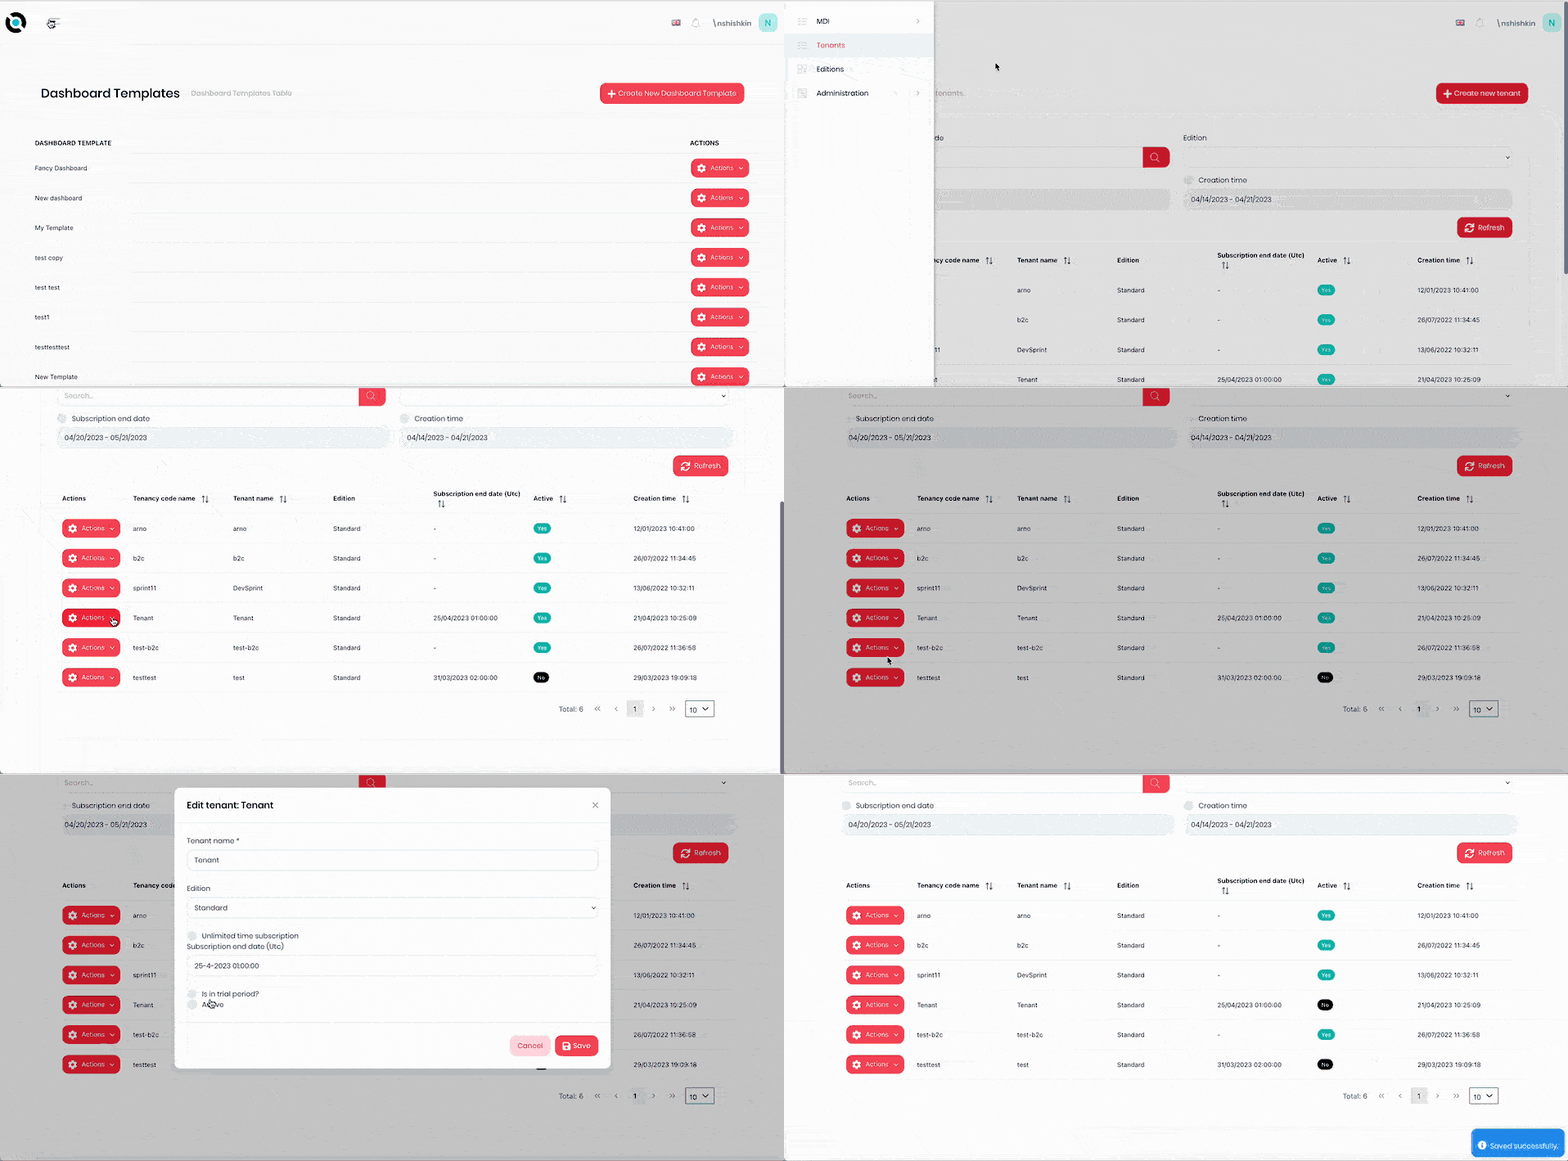
- Click the hamburger menu in the top-left corner.
- Select Tenants.
- Click Actions next to the tenant that you want to activate/deactivate.
- Click Edit.
- Check/uncheck the Active checkbox.
- Click Save.
Edit Features�
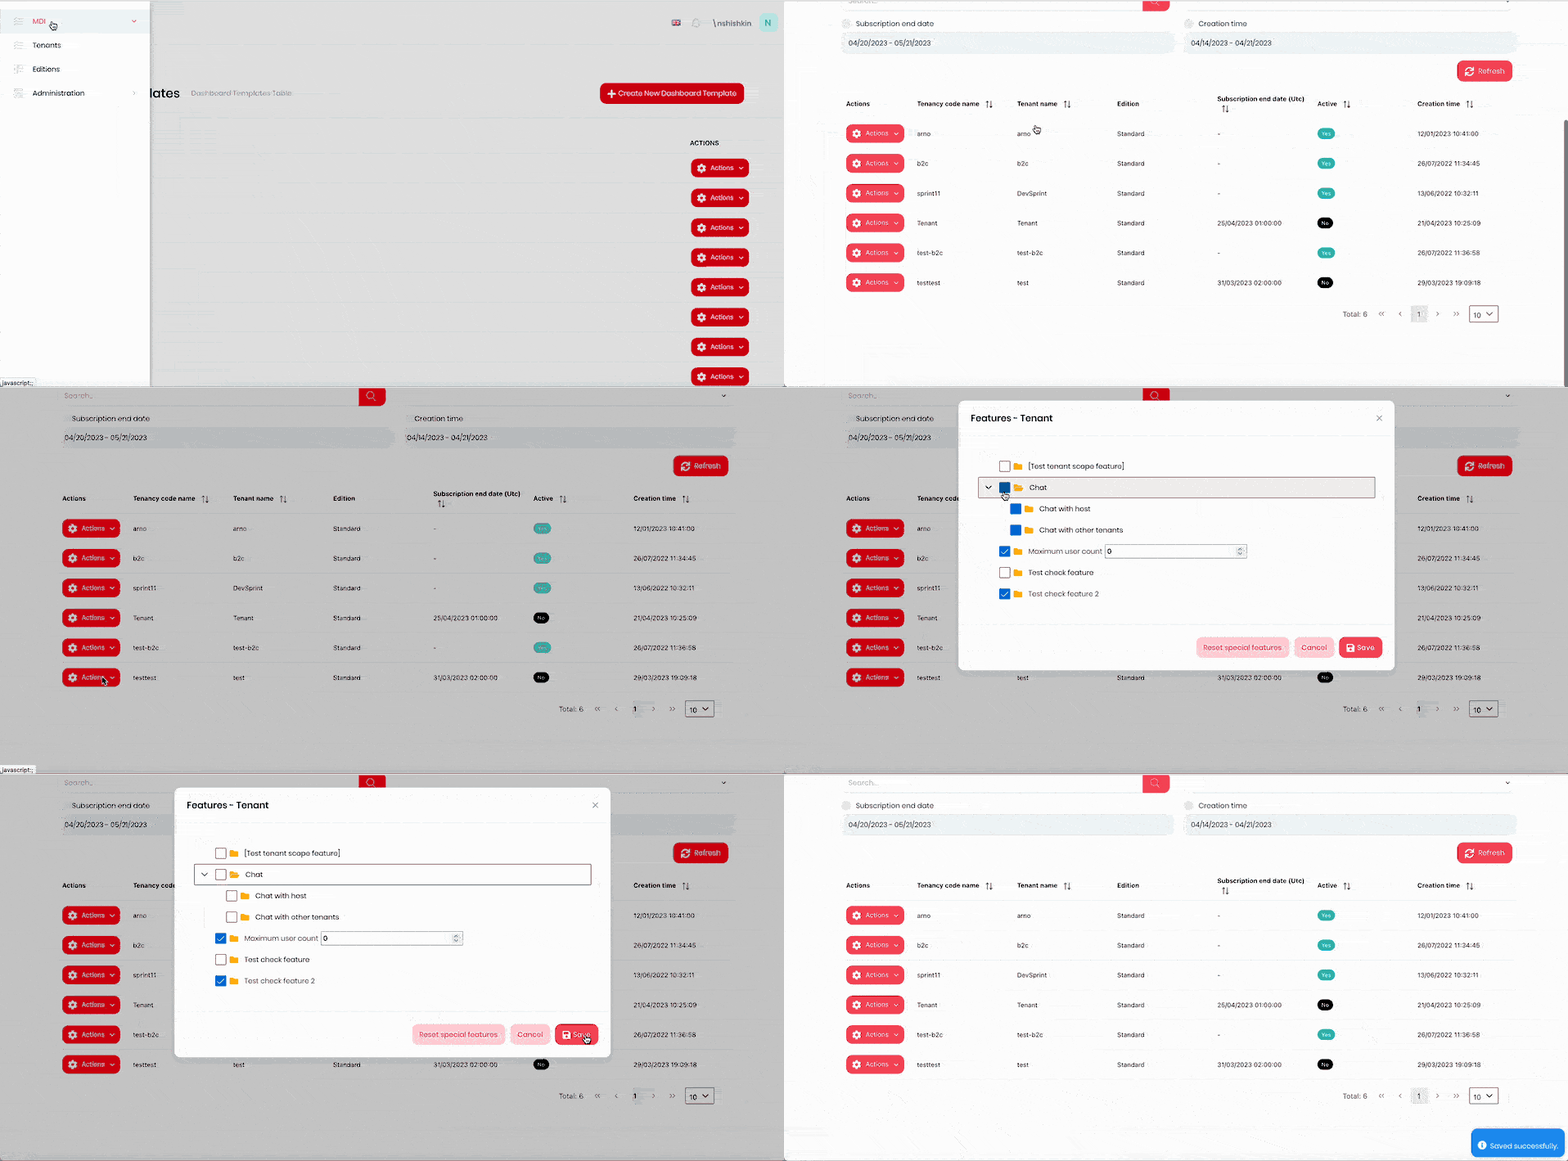
- Click the hamburger menu in the top-left corner.
- Select Tenants.
- Click Actions next to the tenant that you want to edit.
- Click Features.
- Select/deselect features for the tenant. To revert to the default selection, click Reset Special Features.
- Click Save.
Unlock an Admin User for a Tenant
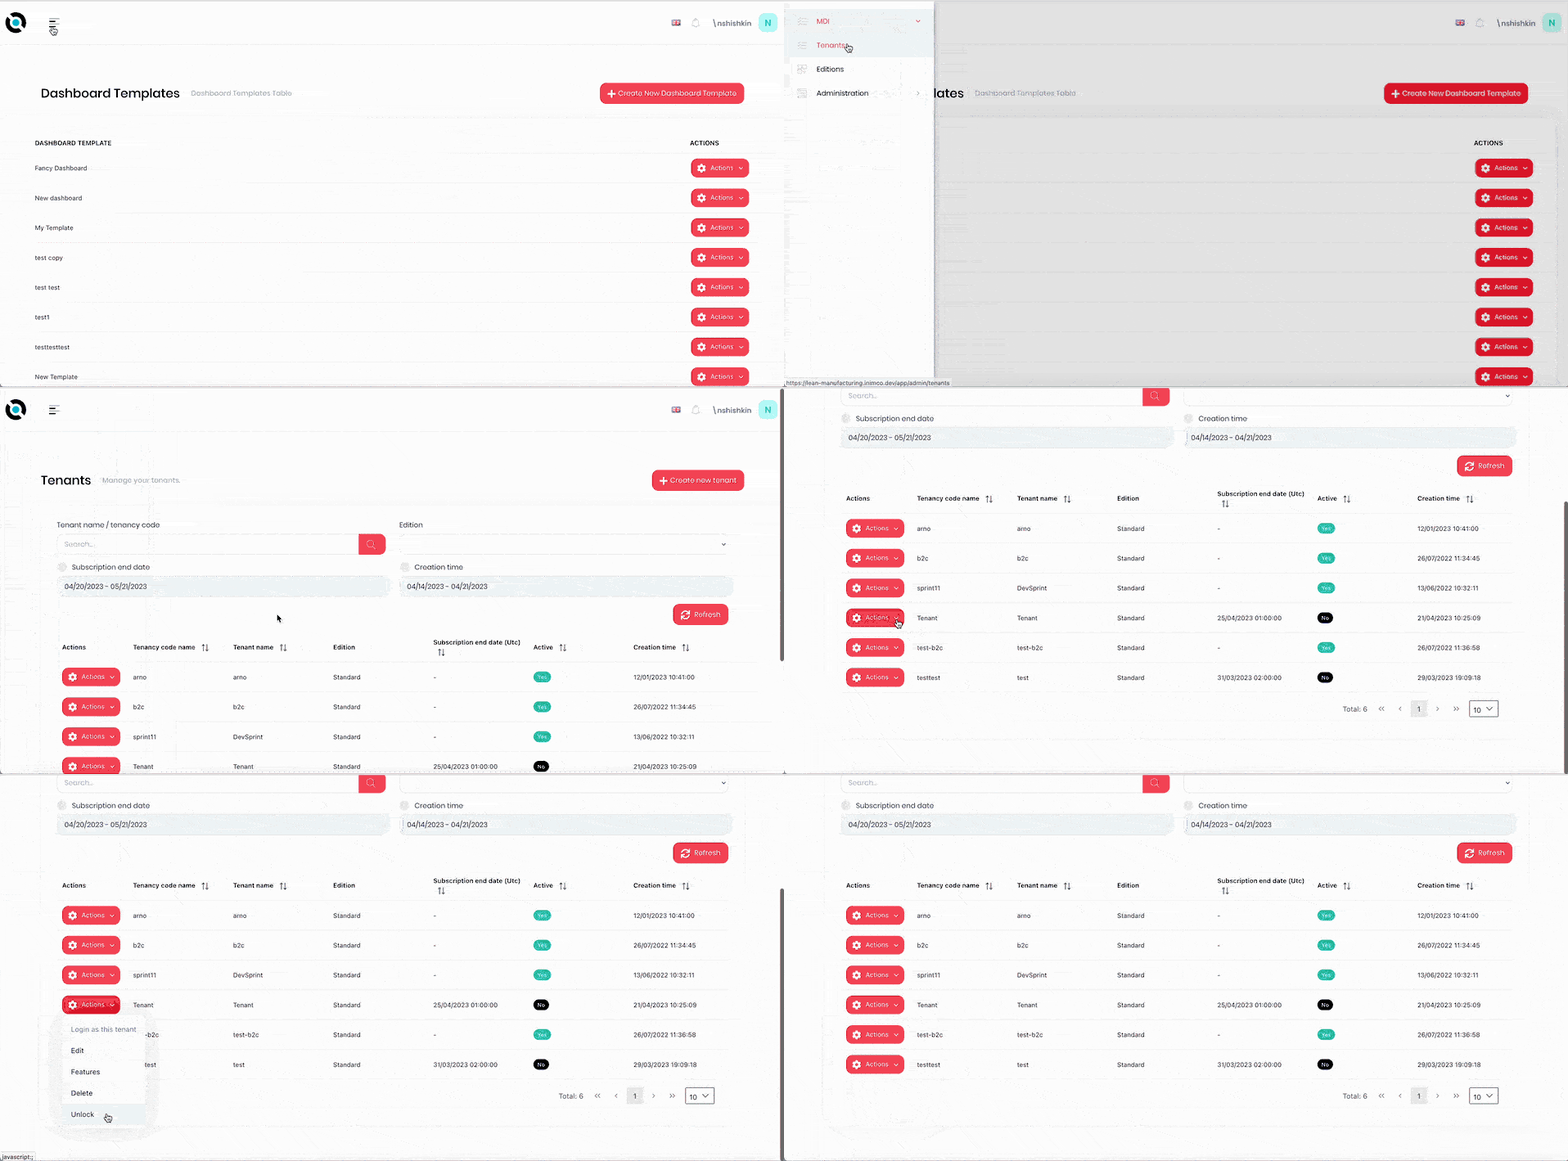
- Click the hamburger menu in the top-left corner.
- Select Tenants.
- Click Actions next to the tenant that you want to unlock the admin user from.
- Click Unlock.
Delete a Tenant
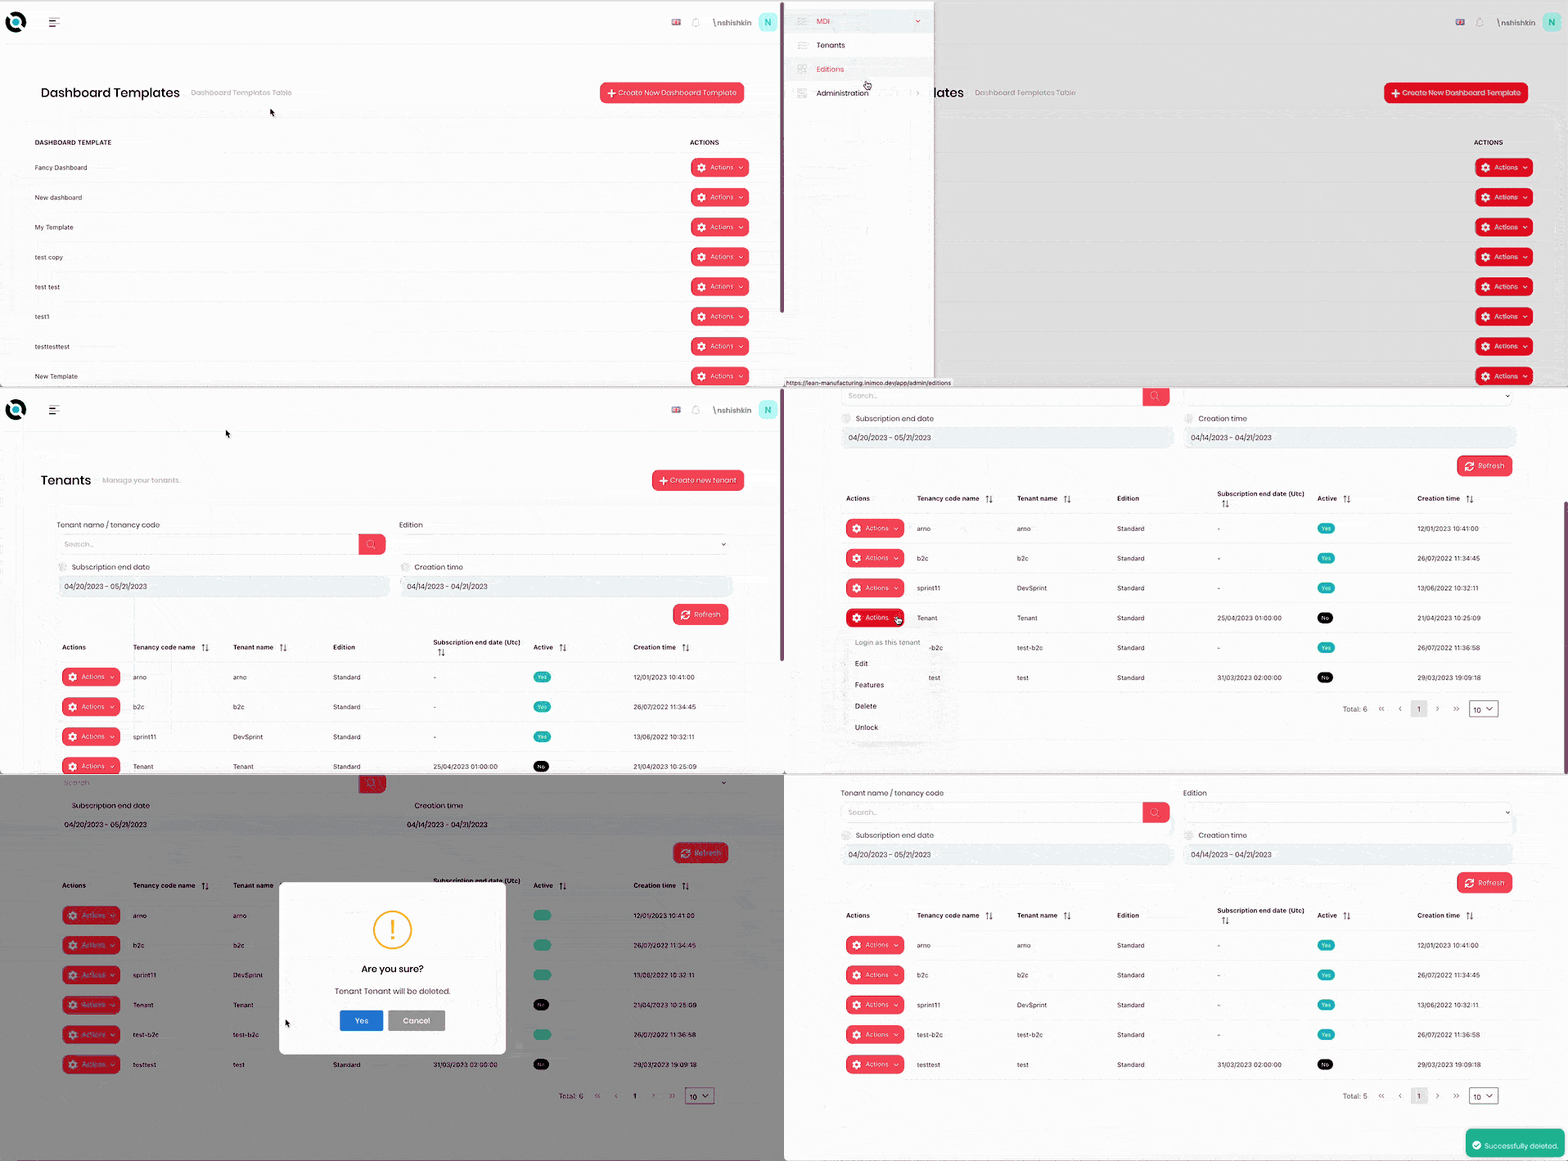
- Click the hamburger menu in the top-left corner.
- Select Tenants.
- Click Actions next to the tenant that you want to unlock the admin user from.
- Click Delete.
- Confirm deletion.