Operations with Action Lists
This section describes all operations that a Tenant user can perform with Action lists.
Create an Action List
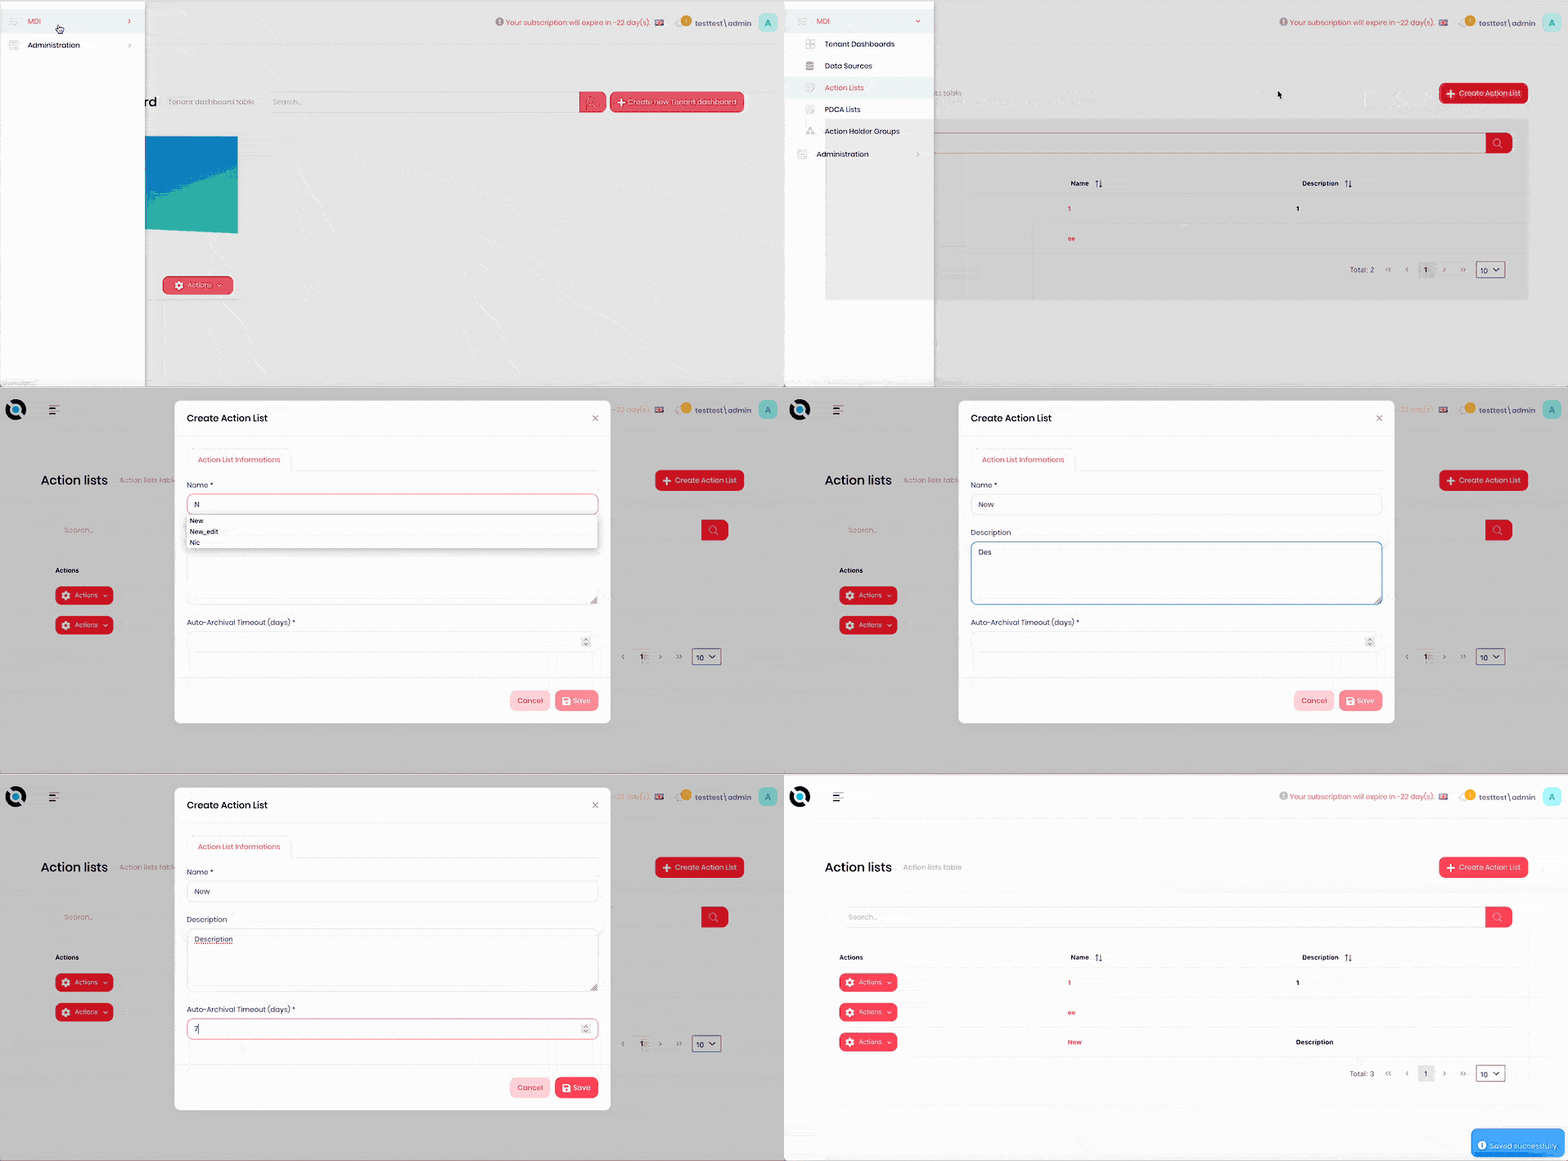
- Click the hamburger menu in the top-left corner.
- Select MDI > Action Lists.
- Click Create action list.
- Enter the action list name into the Name field.
- If required, add a description to the action item in the Description field.
- Add the timeout value in days into the Auto-Archival Timeout (days) field.
- Click Save.
Edit an Action List
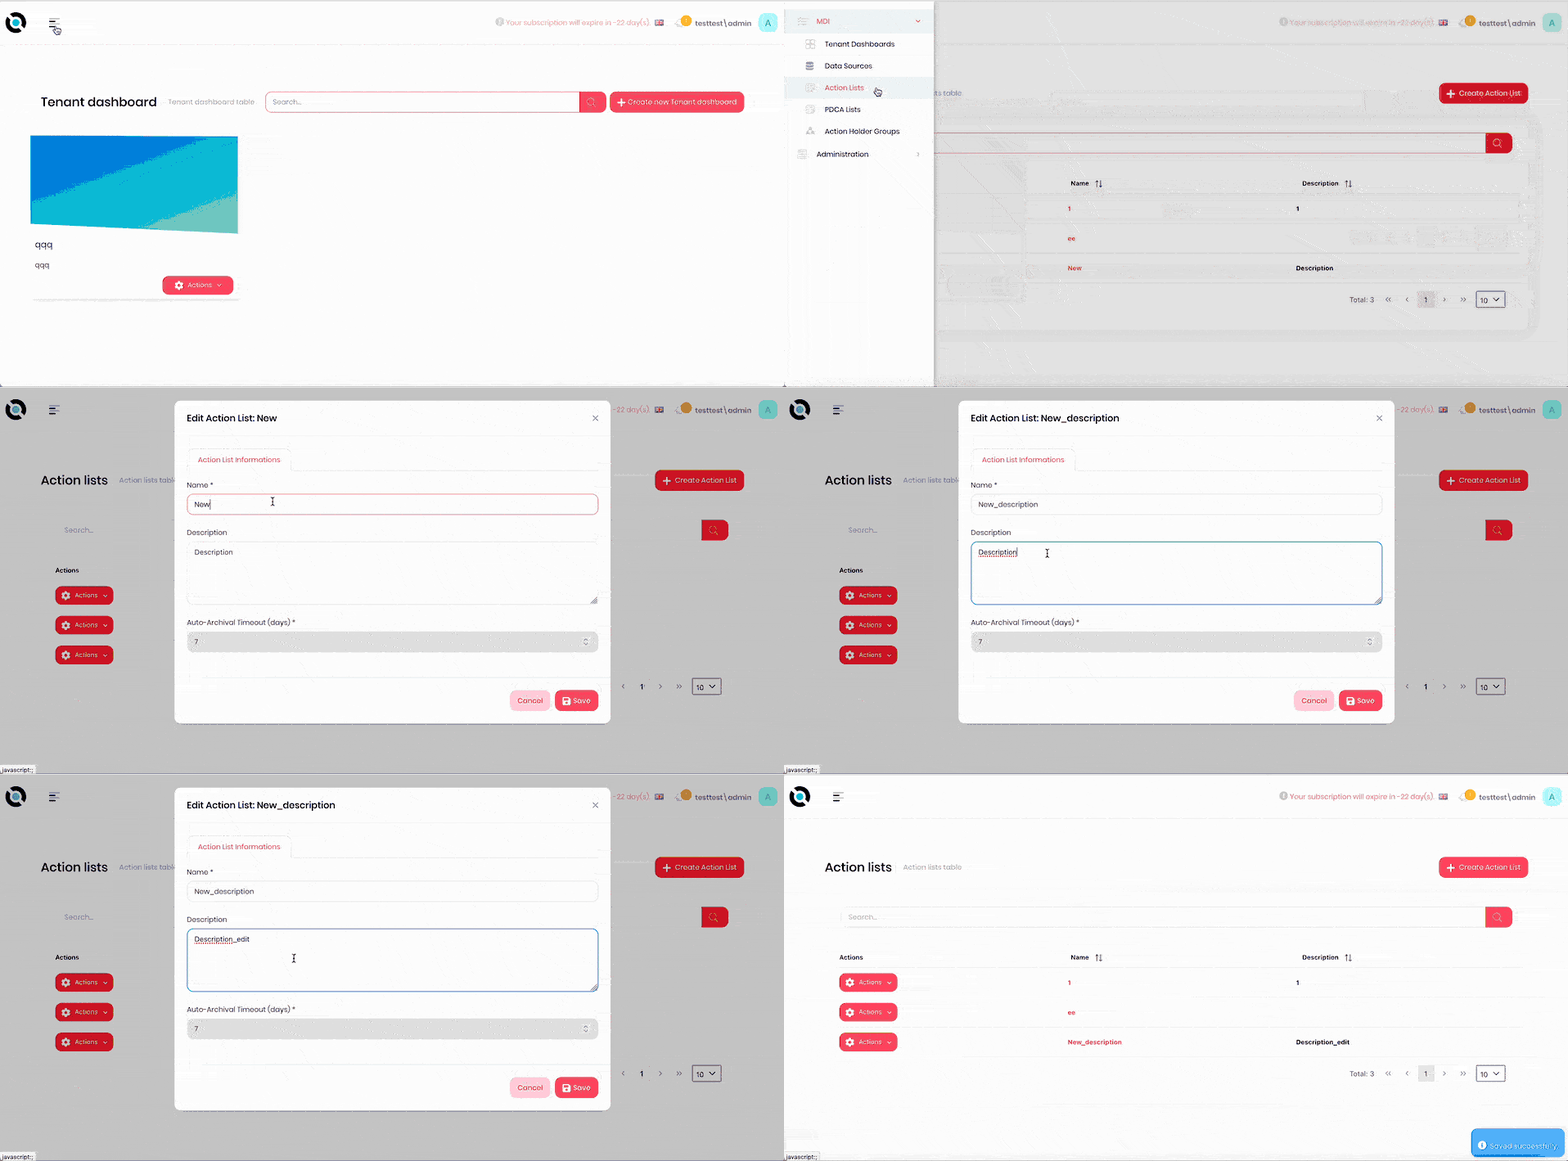
- Click the hamburger menu in the top-left corner.
- Select MDI > Action Lists.
- Click Actions next to the action list you want to edit.
- Click Edit.
- Enter the new action list name into the Name field.
- If required, amend the description in the Description field.
- Click Save.
Delete an Action List
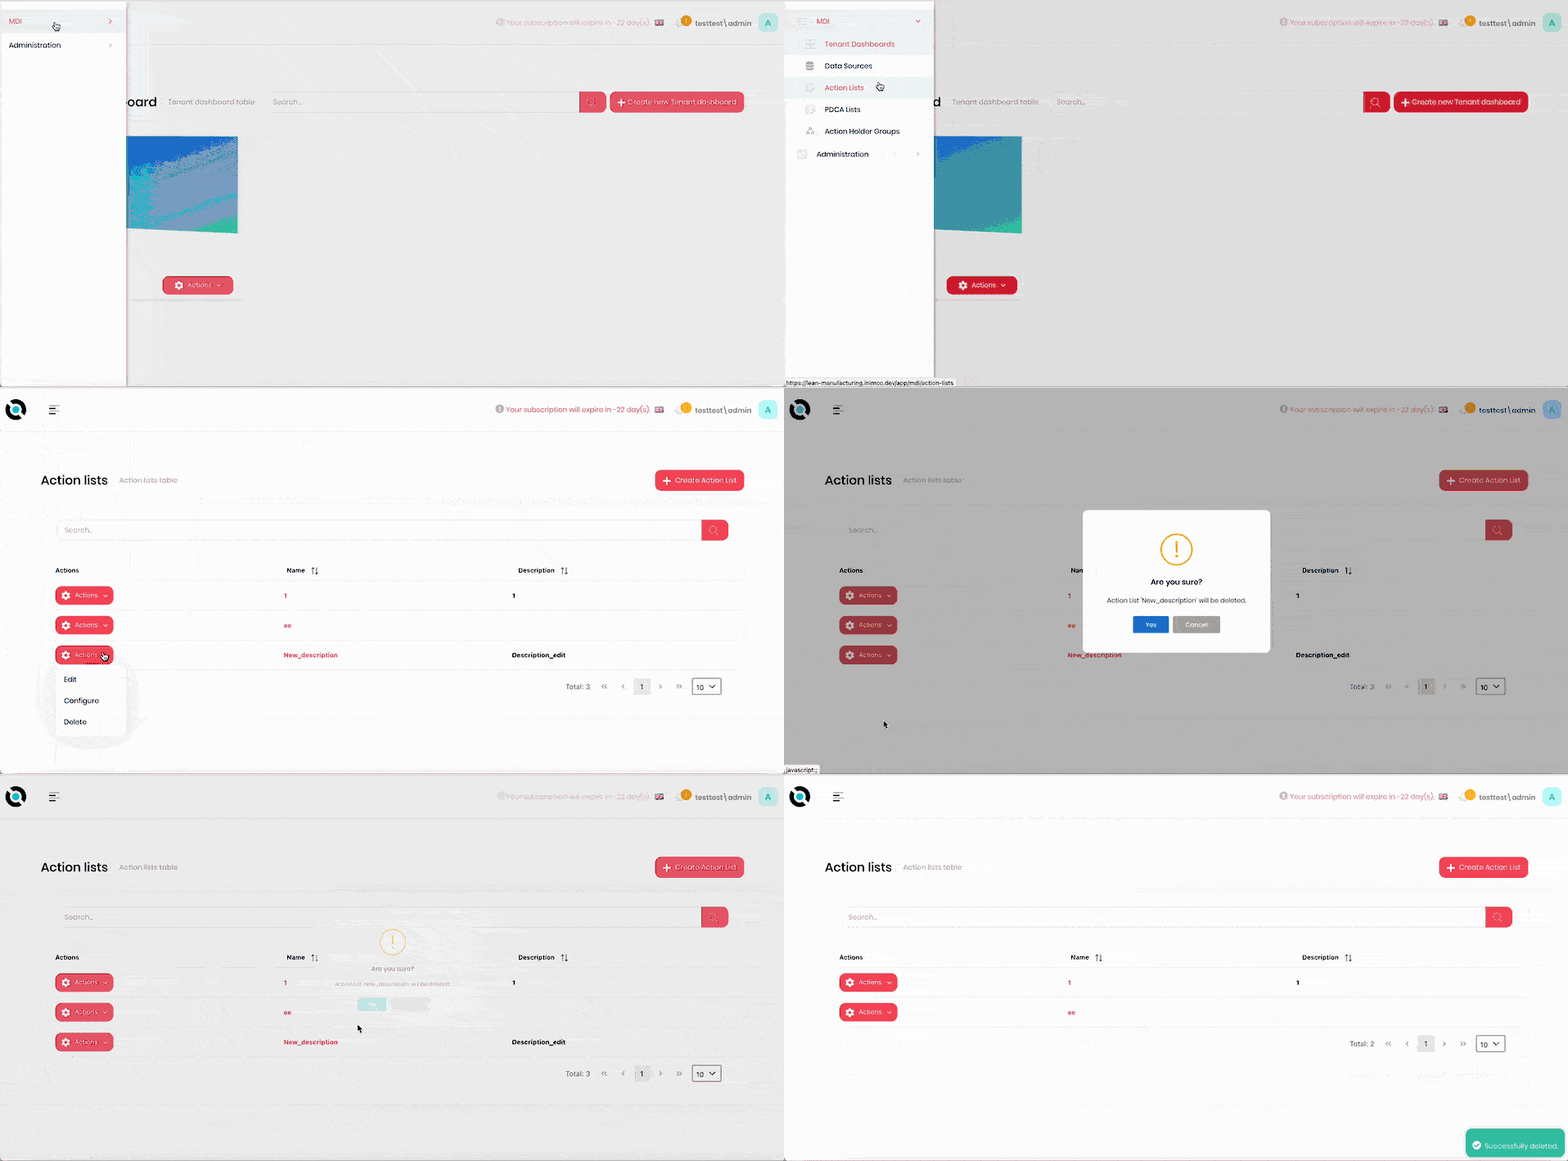
- Click the hamburger menu in the top-left corner.
- Select MDI > Action Lists.
- Click Actions next to the action list you want to delete.
- Click Delete.
- Confirm deletion.
Access Action List Configuration
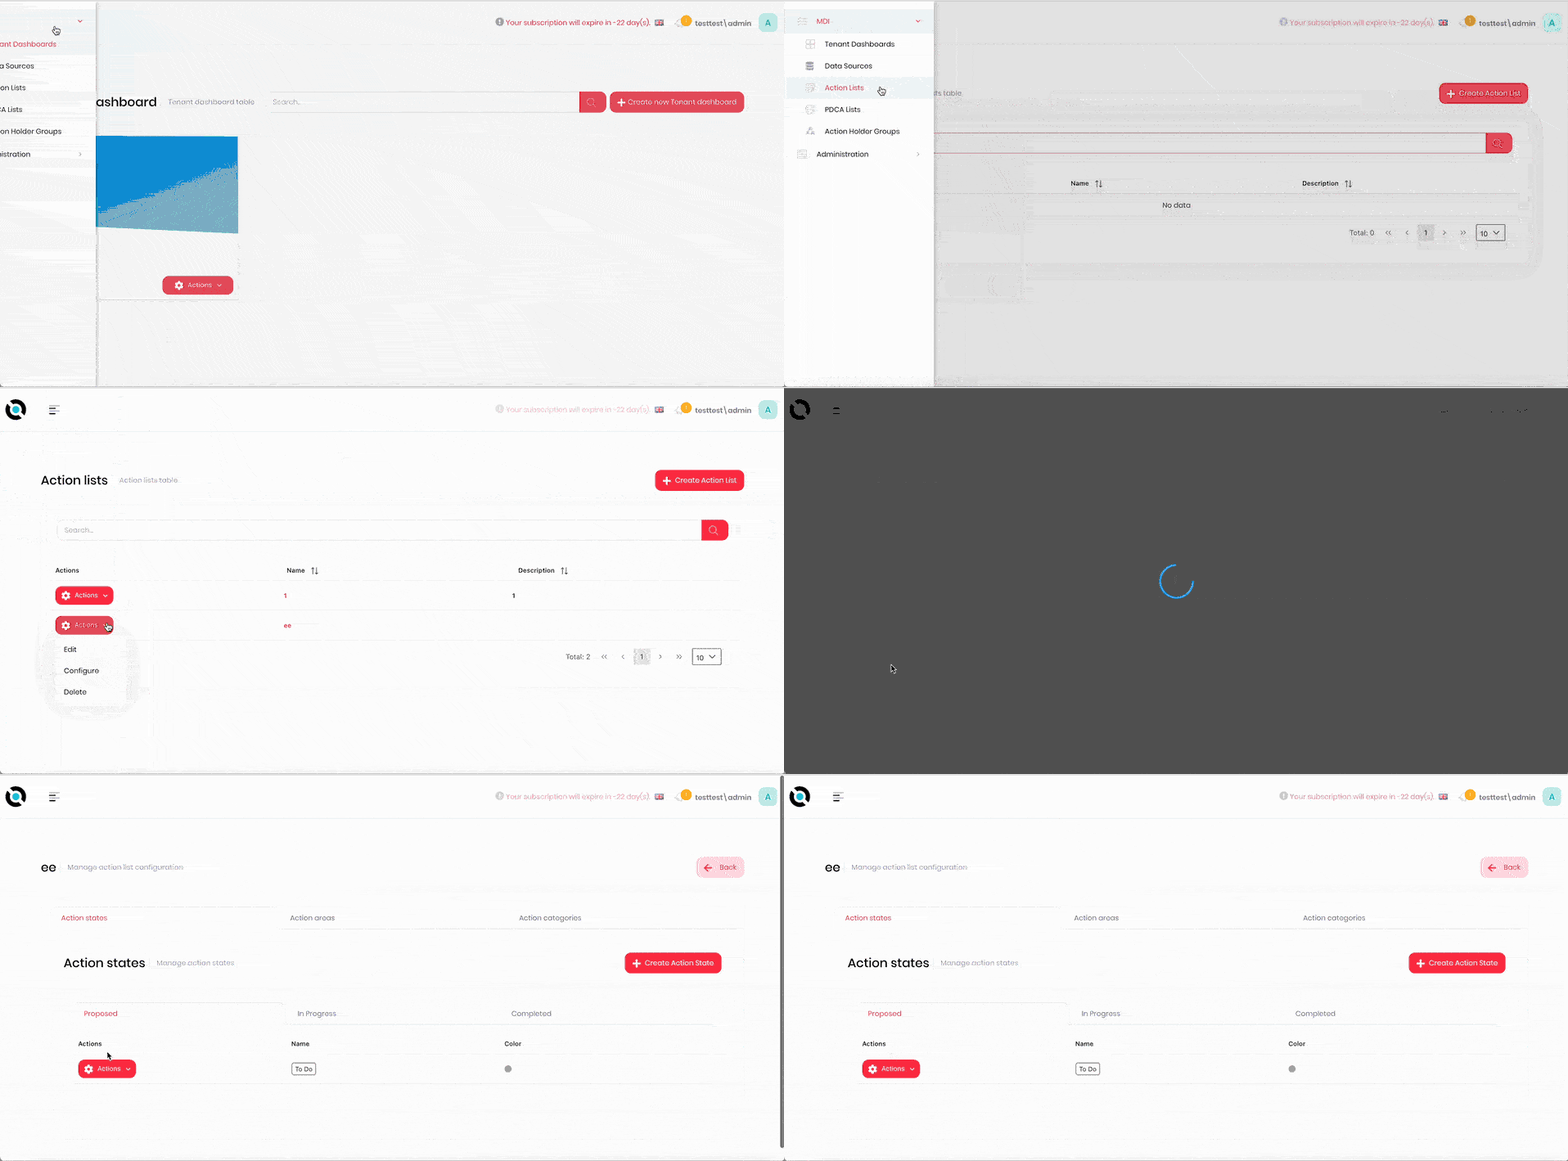
- Click the hamburger menu in the top-left corner.
- Select MDI > Action Lists.
- Click Actions next to the action list you want to configure.
- Click Configure.
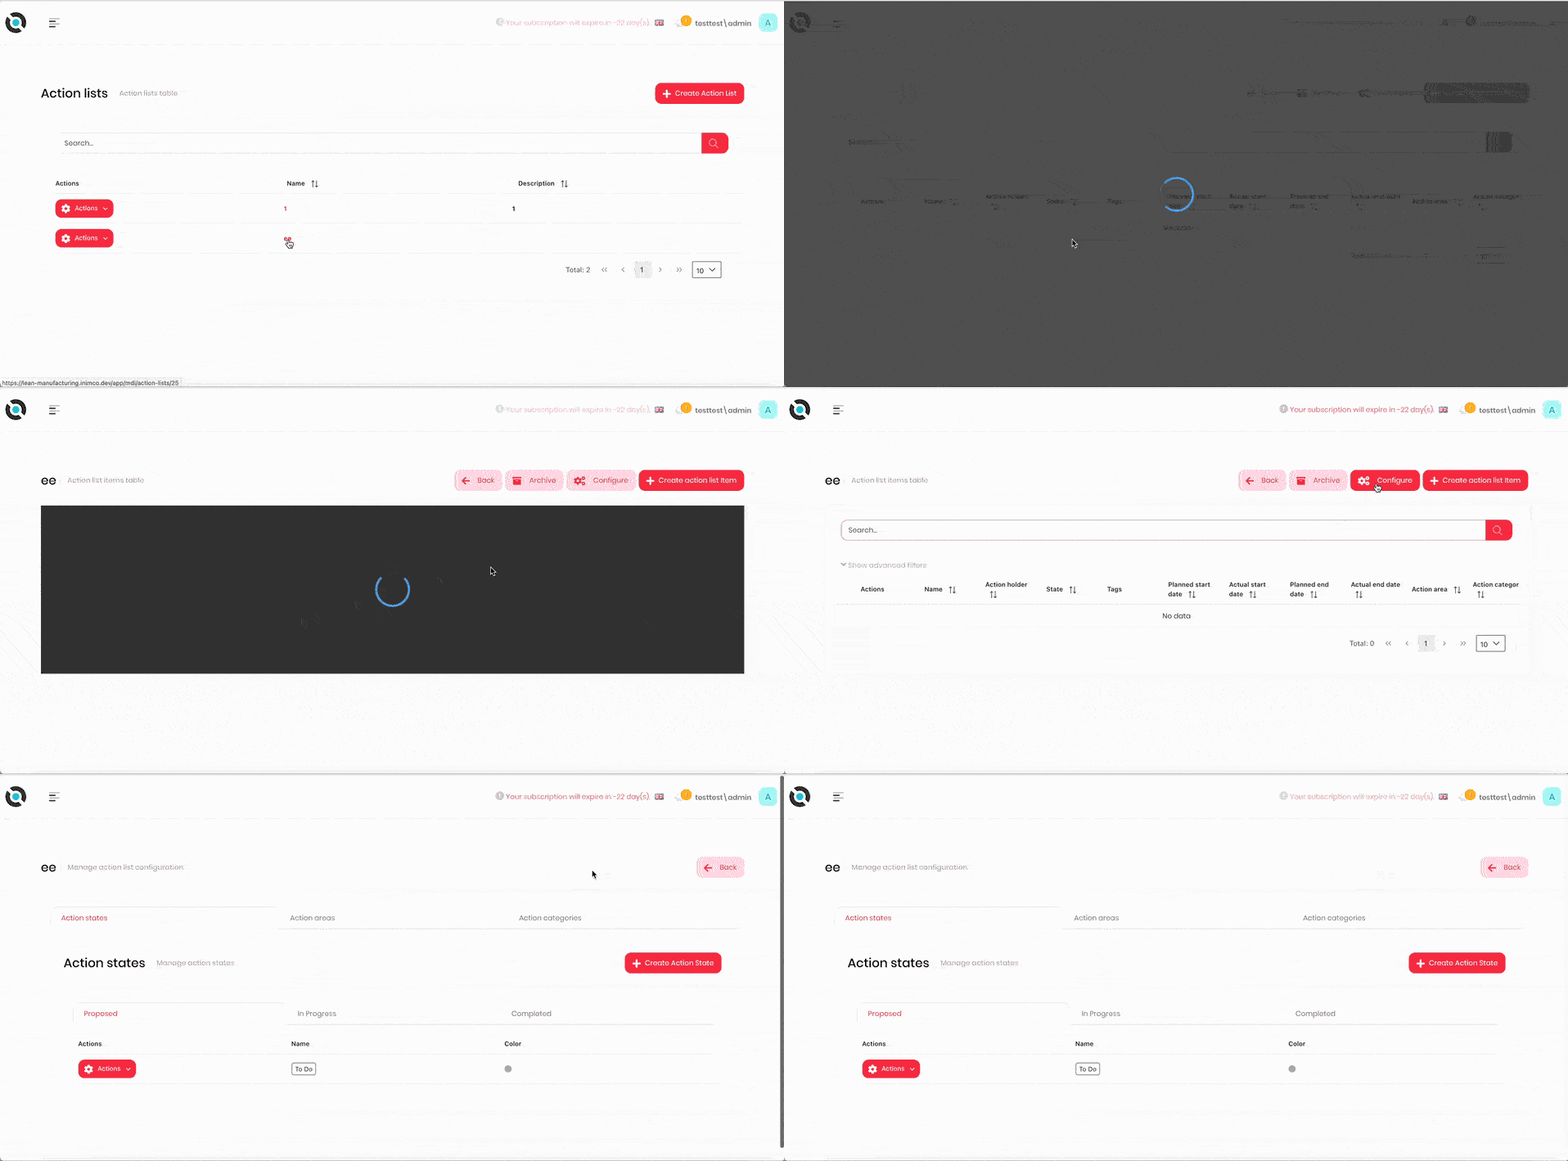
Alternatively:
- Click the hamburger menu in the top-left corner.
- Select MDI > Action Lists.
- Click the action list.
- Click Configure.
Create an Action State
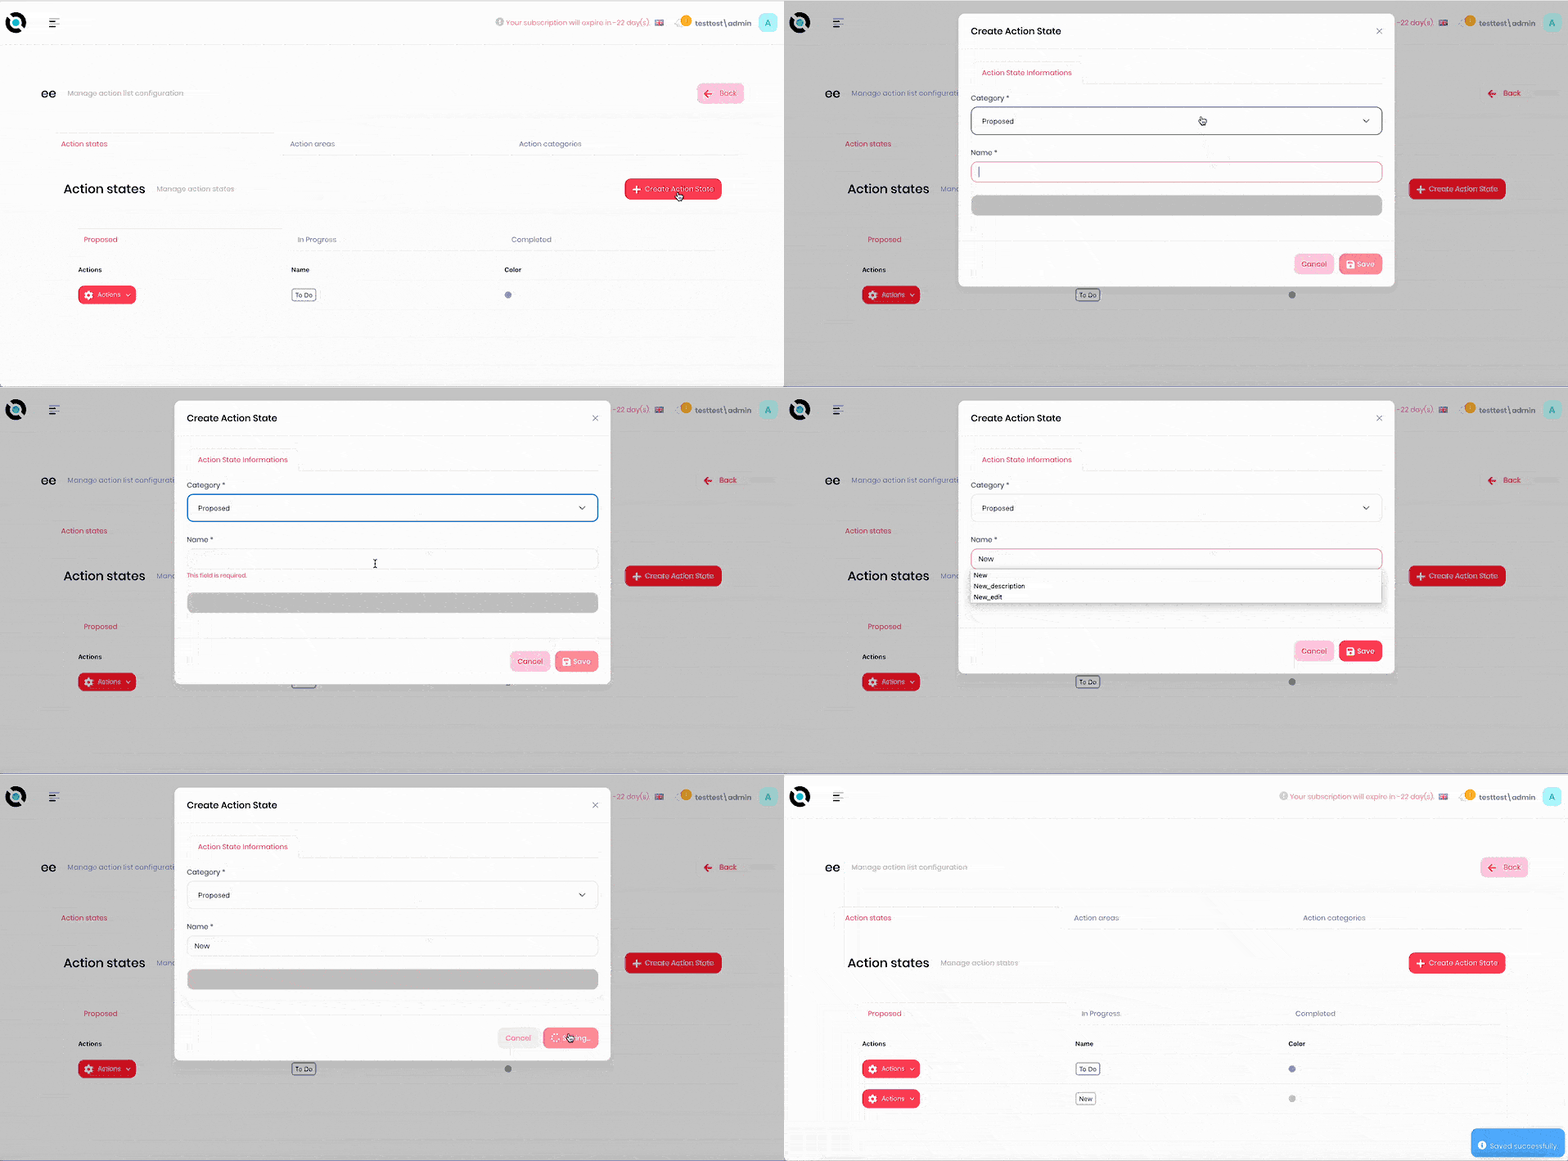
- Navigate to the action list configuration screen.
- Click Create action state.
- Select the category to add the state to from the Category dropdown.
- Enter the action state name into the Name field.
- Click Save.
Edit an Action State
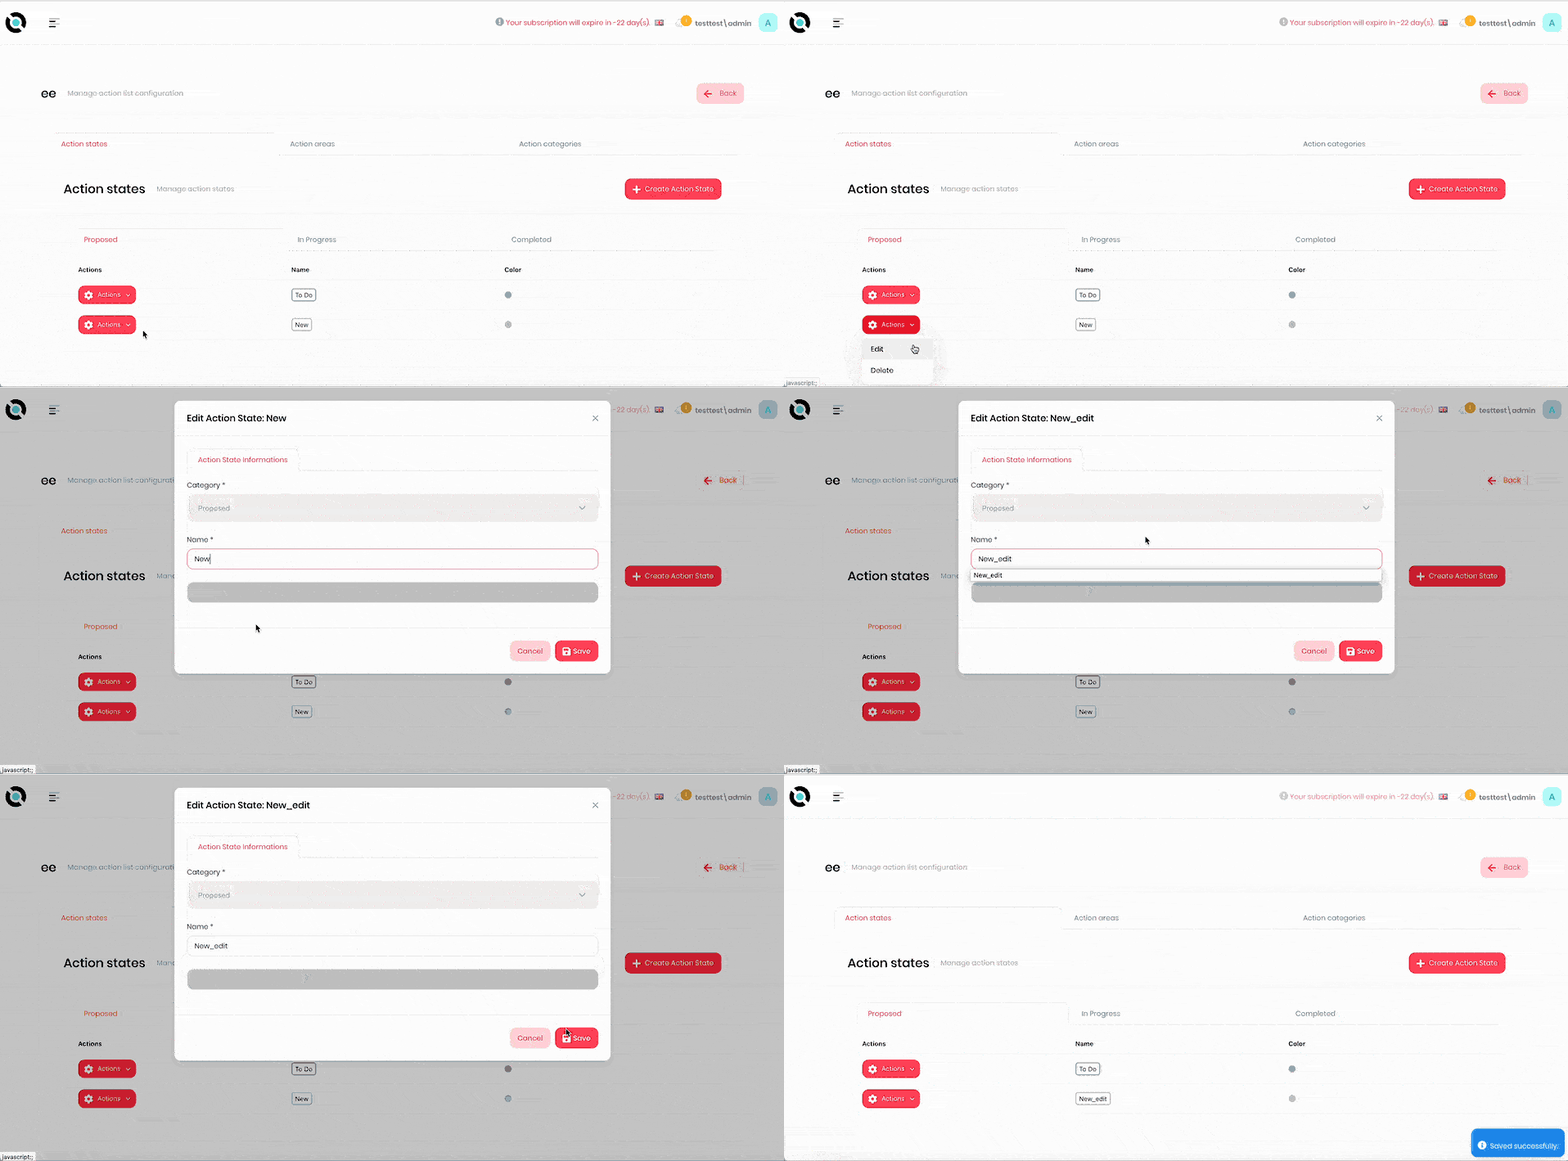
- Navigate to the action list configuration screen.
- Click Actions next to the action state you want to edit.
- Click Edit.
- Amend the category in the Category dropdown.
- Enter the new action state name into the Name field.
- Click Save.
Delete an Action State
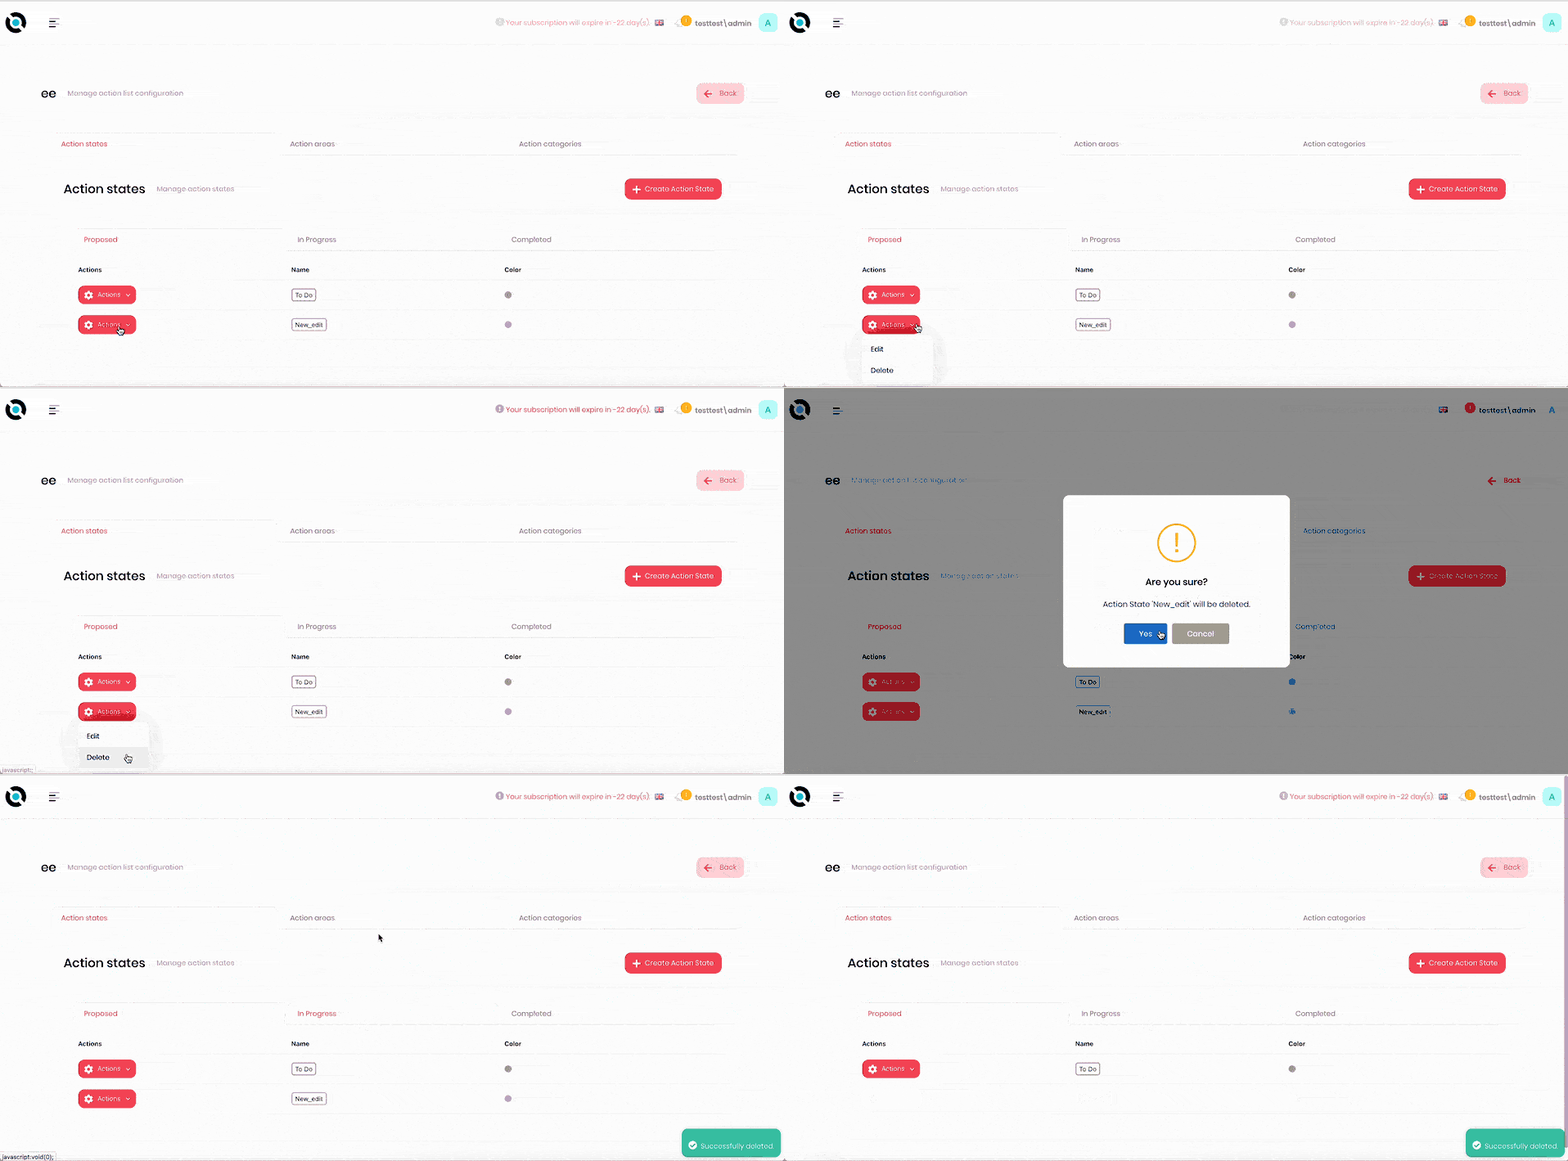
- Navigate to the action list configuration screen.
- Click Actions next to the action state you want to delete.
- Click Delete.
- Confirm deletion.
Create an Action Area
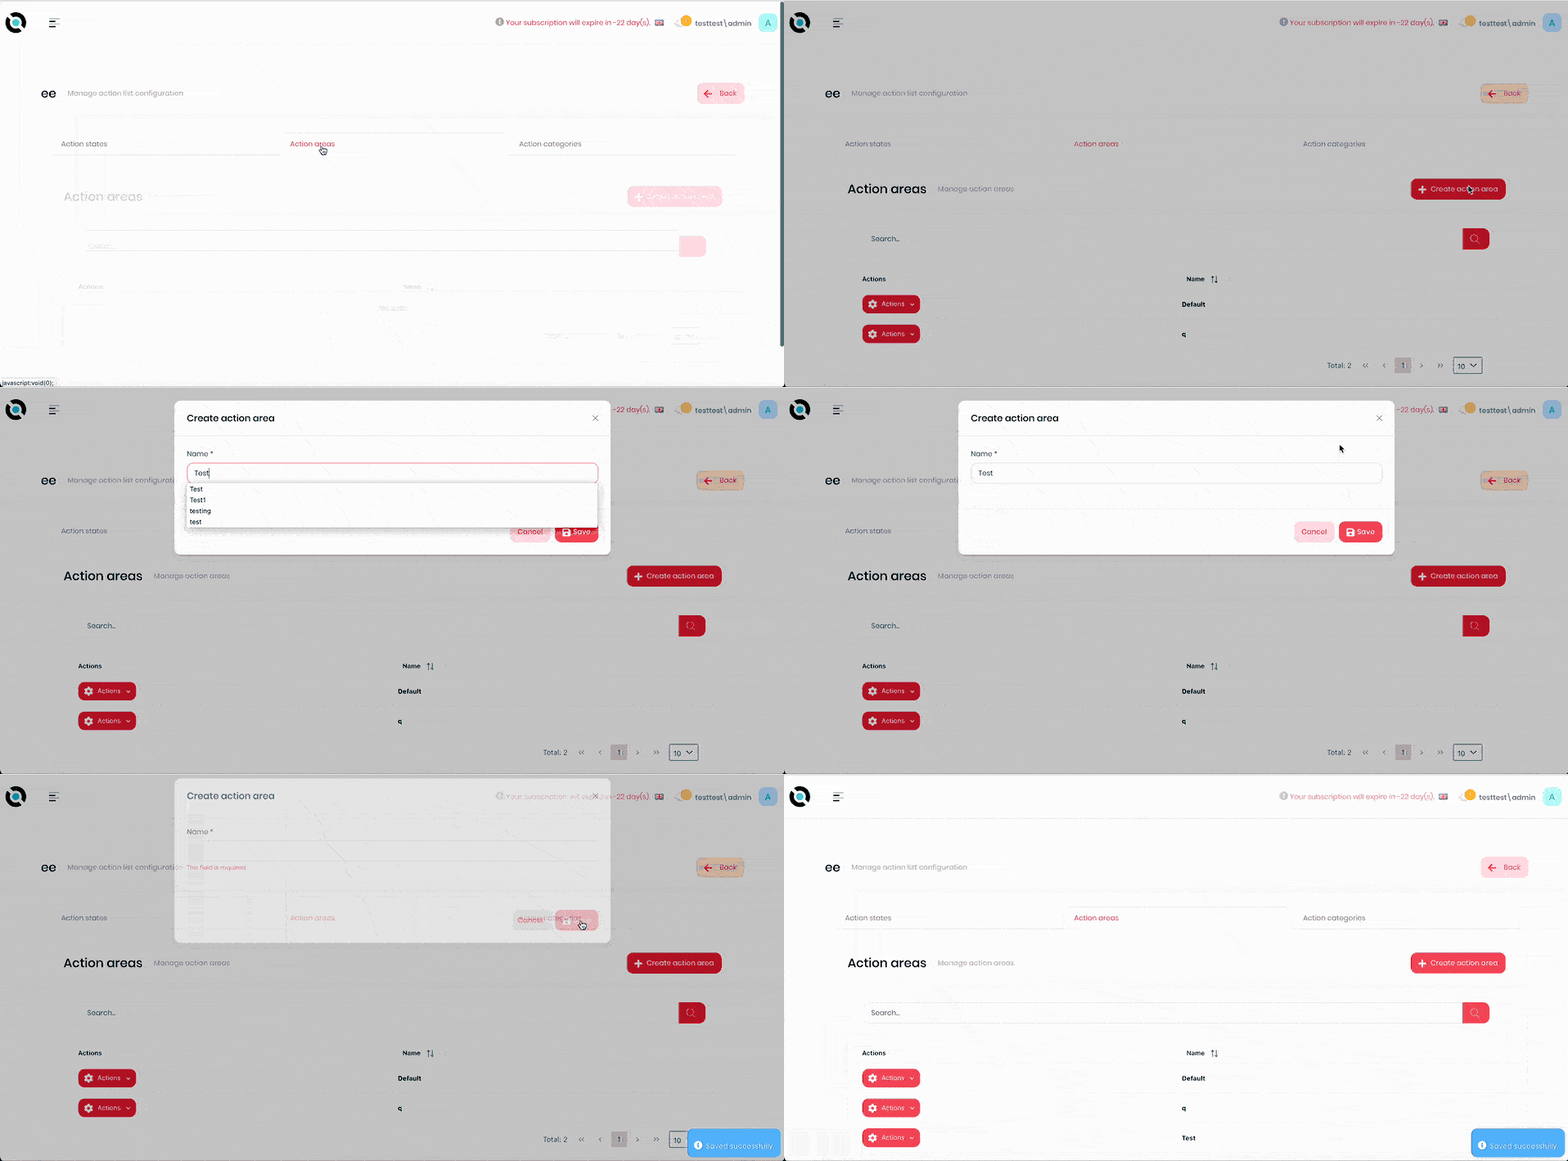
- Navigate to the action list configuration screen.
- Select the Action areas tab.
- Click Create action area.
- Enter the action area name into the Name field.
- Click Save.
Edit an Action Area
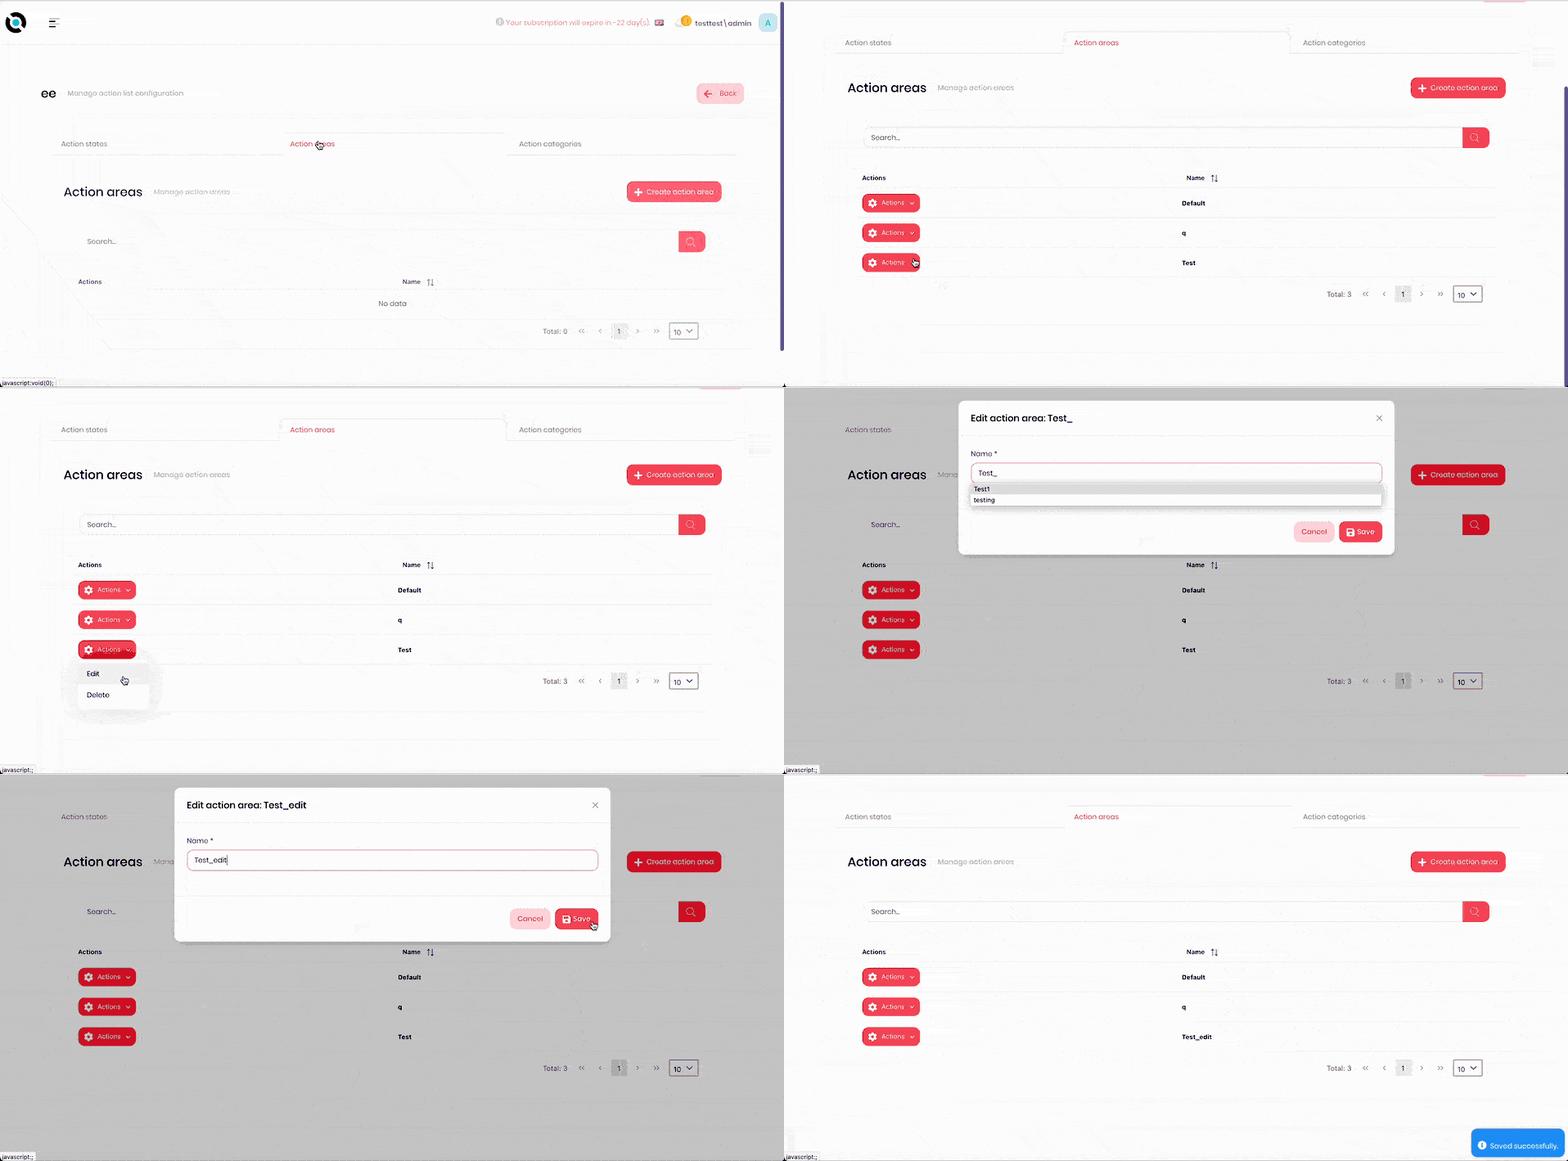
- Navigate to the action list configuration screen.
- Select the Action areas tab.
- Click Actions next to the action area you want to edit.
- Click Edit.
- Enter the new action area name into the Name field.
- Click Save.
Delete an Action Area
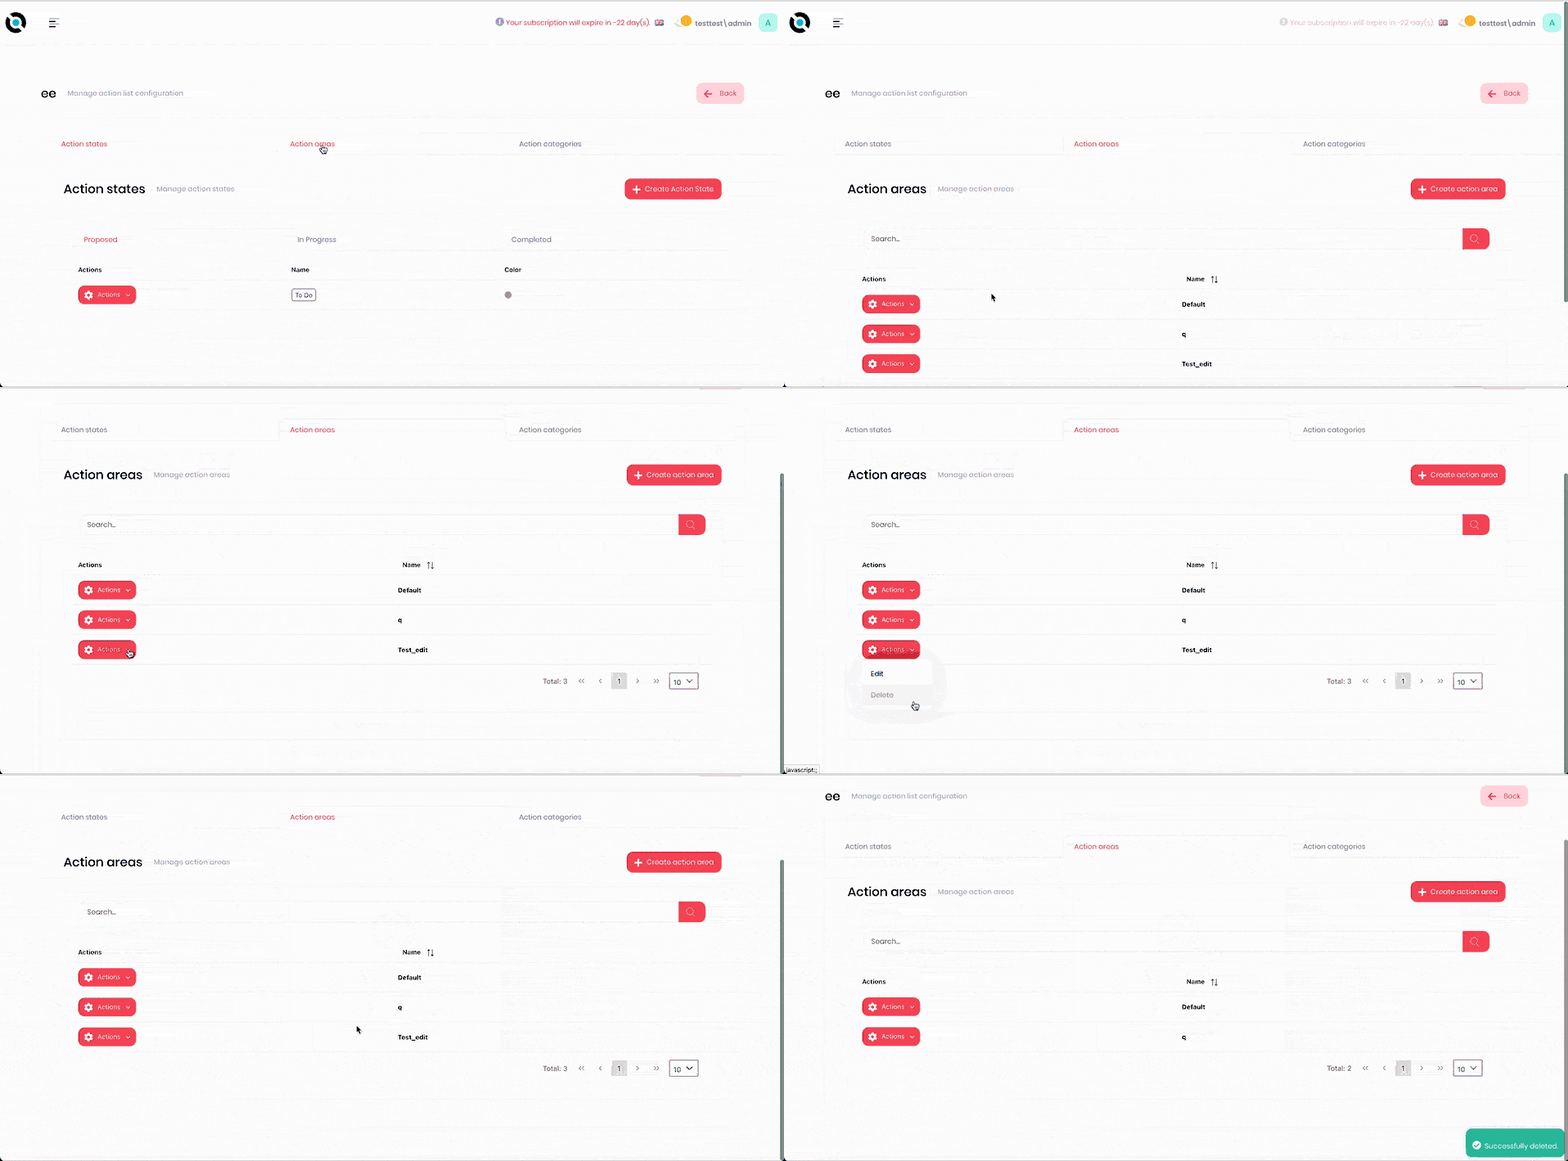
- Navigate to the action list configuration screen.
- Select the Action areas tab.
- Click Actions next to the action area you want to delete.
- Click Delete.
- Confirm deletion.
Create an Action Category
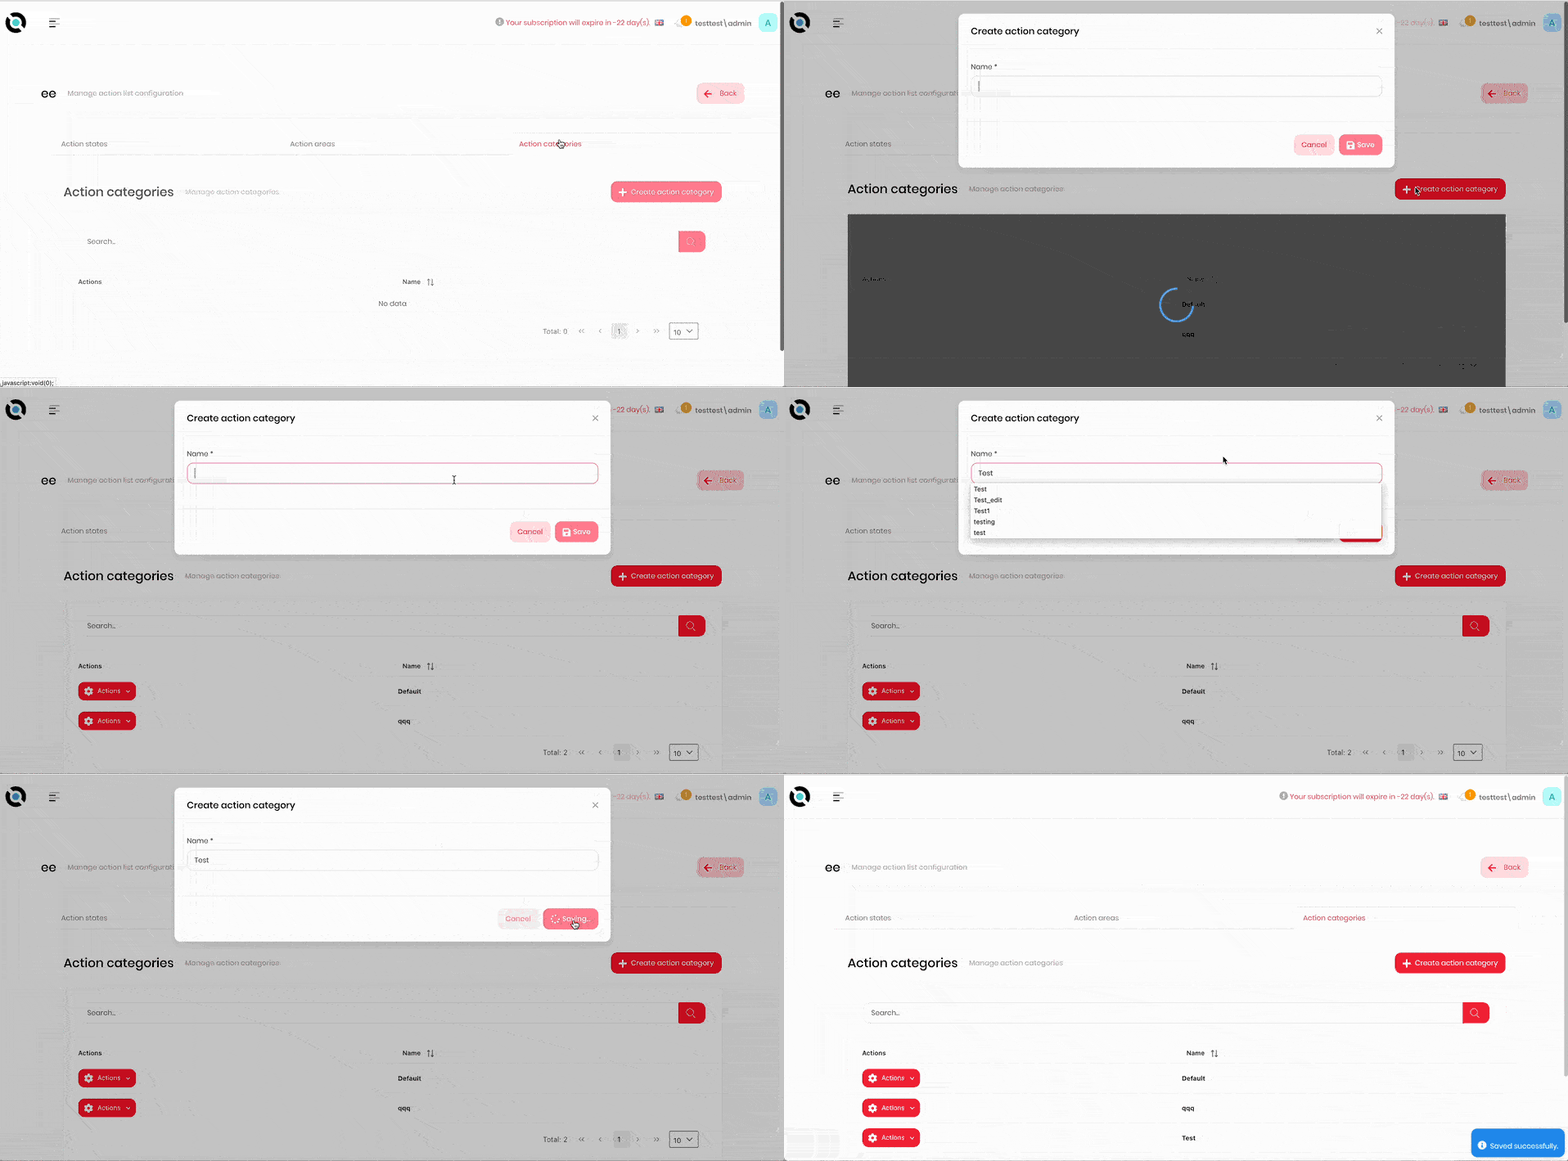
- Navigate to the action list configuration screen.
- Select the Action categories tab.
- Click Create action category.
- Enter the category name into the Name field.
- Click Save.
Edit an Action Category
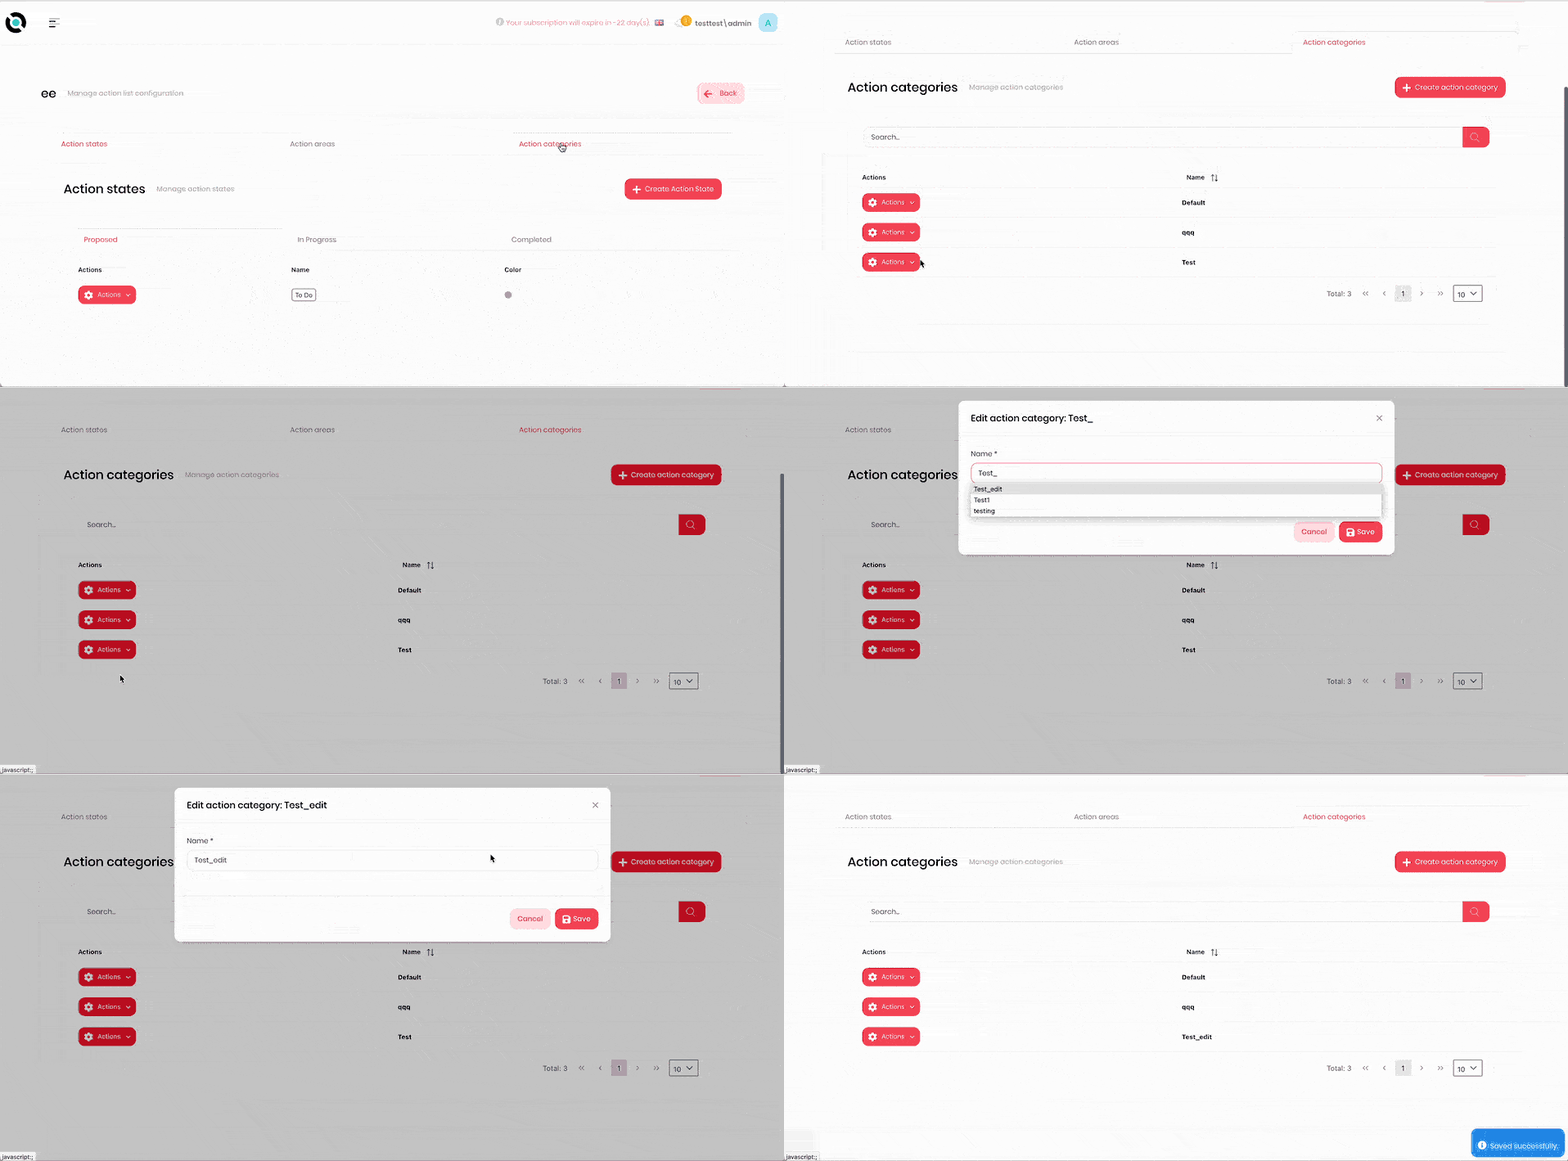
- Navigate to the action list configuration screen.
- Select the Action categories tab.
- Click Actions next to the action category you want to edit.
- Click Edit.
- Enter the new action category name into the Name field.
- Click Save.
Delete an Action Category
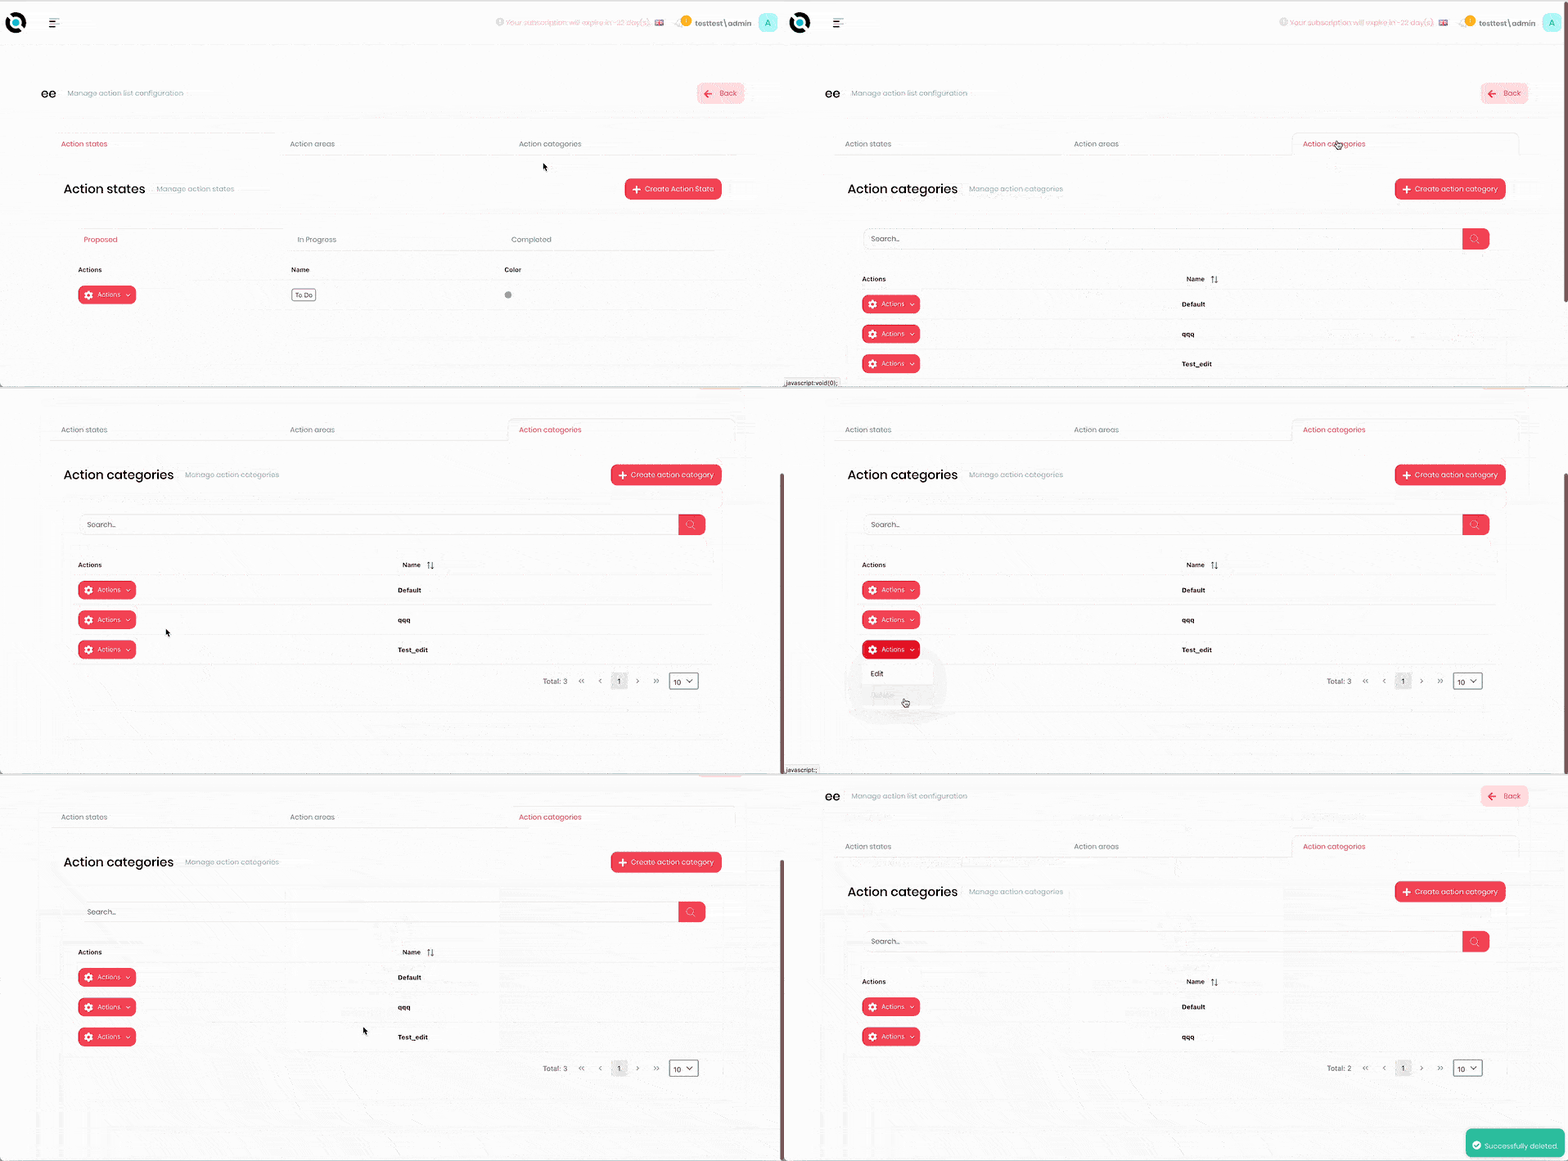
- Navigate to the action list configuration screen.
- Select the Action categories tab.
- Click Actions next to the action category you want to delete.
- Click Delete.
- Confirm deletion.
Archive an Action List Item
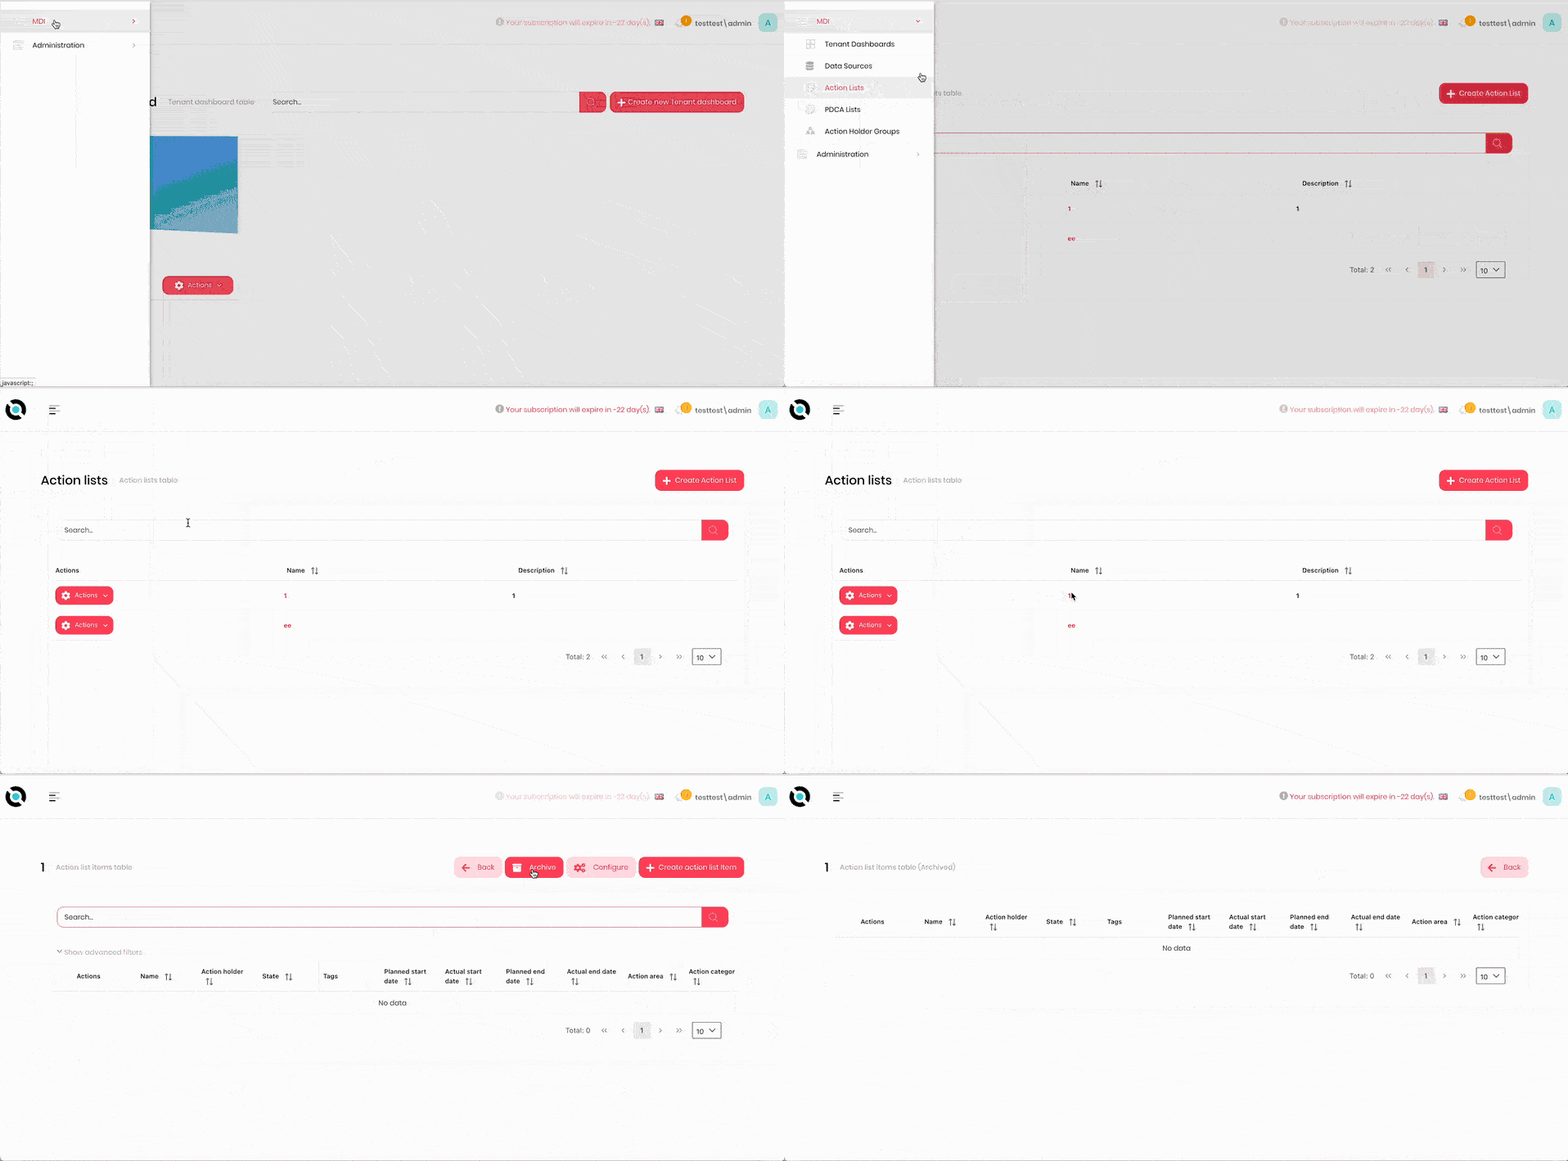
- Click the hamburger menu in the top-left corner.
- Select MDI > Action Lists.
- Select the action list.
- Click Archive.
Create an Action List Item
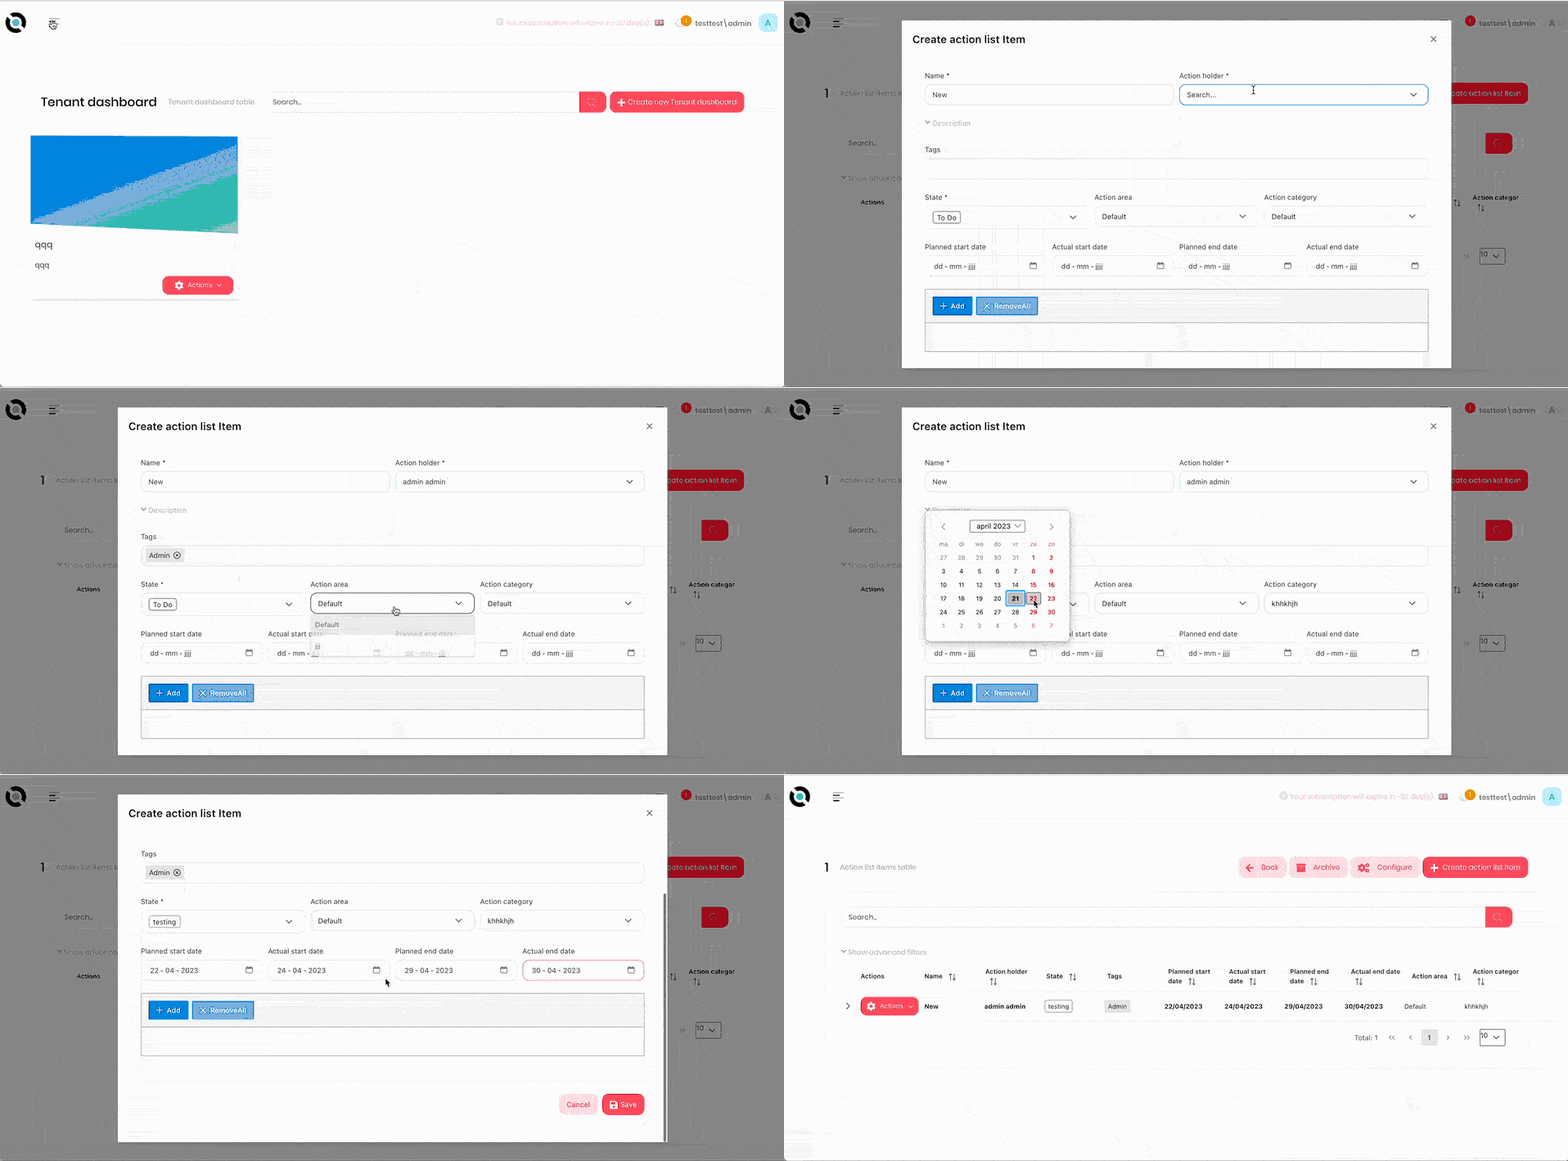
- Click the hamburger menu in the top-left corner.
- Select MDI > Action Lists.
- Select the action list.
- Click Create action list item.
- Enter the action list item name into the Name field.
- Select the action list item holder from the Action holder dropdown.
- Enter required tags into the Tags field.
- Select the state from the State dropdown.
- Select the action area from the Action area dropdown.
- Select the action category from the Action Category dropdown.
- Select the planned start date using the Planned start date selector.
- Select the actual start date using the Actual start date selector.
- Select the planned end date using the Planned end date selector.
- Select the actual end date using the Actual end date selector.
- If required, click Add to add any attachments. To remove attachments, click Remove All.
Edit an Action List Item
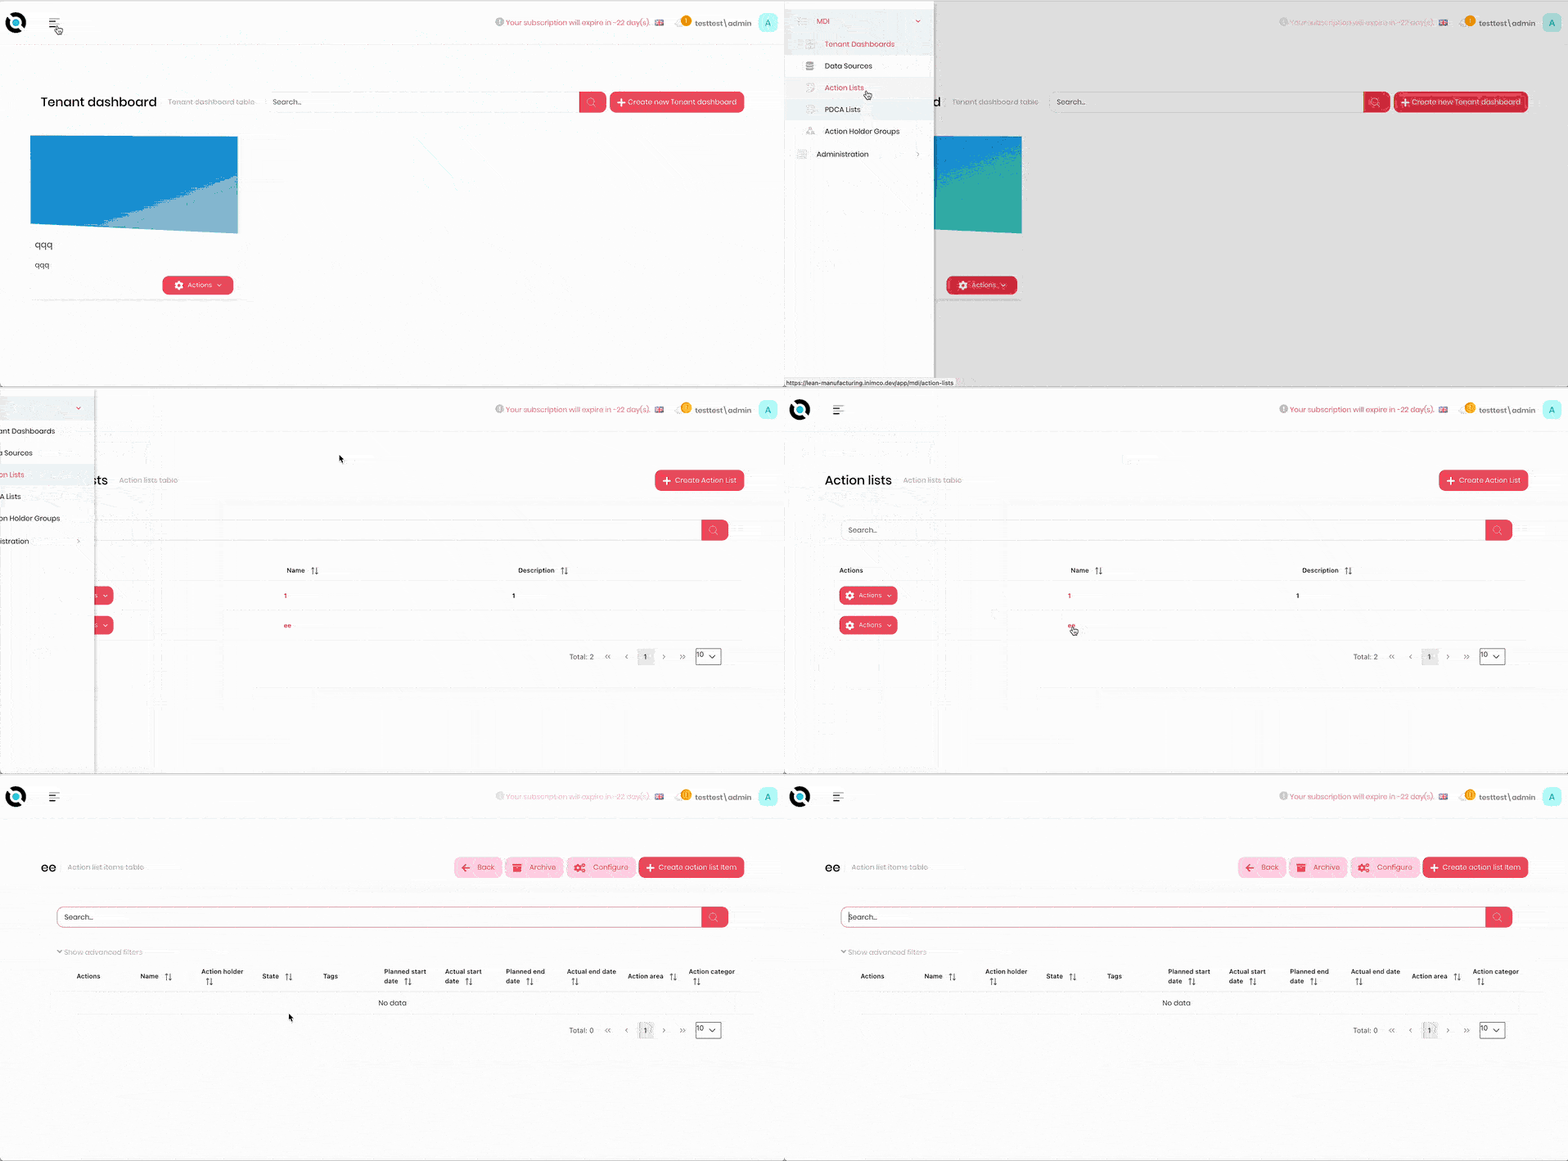
- Click the hamburger menu in the top-left corner.
- Select MDI > Action Lists.
- Select the action list.
- Click Actions next to the Action List Item you want to edit.
- Click Edit.
- Enter the new action list item name into the Name field.
- Select the new action list item holder from the Action holder dropdown.
- Edit tags in the Tags field.
- Edit the state in the State dropdown.
- Edit the action area in the Action area dropdown.
- Edit the action category in the Action Category dropdown.
- Edit the planned start date using the Planned start date selector.
- Edit the actual start date using the Actual start date selector.
- Edit the planned end date using the Planned end date selector.
- Edit the actual end date using the Actual end date selector.
- If required, click Add to add any attachments. To remove attachments, click Remove All.
Delete an Action List Item
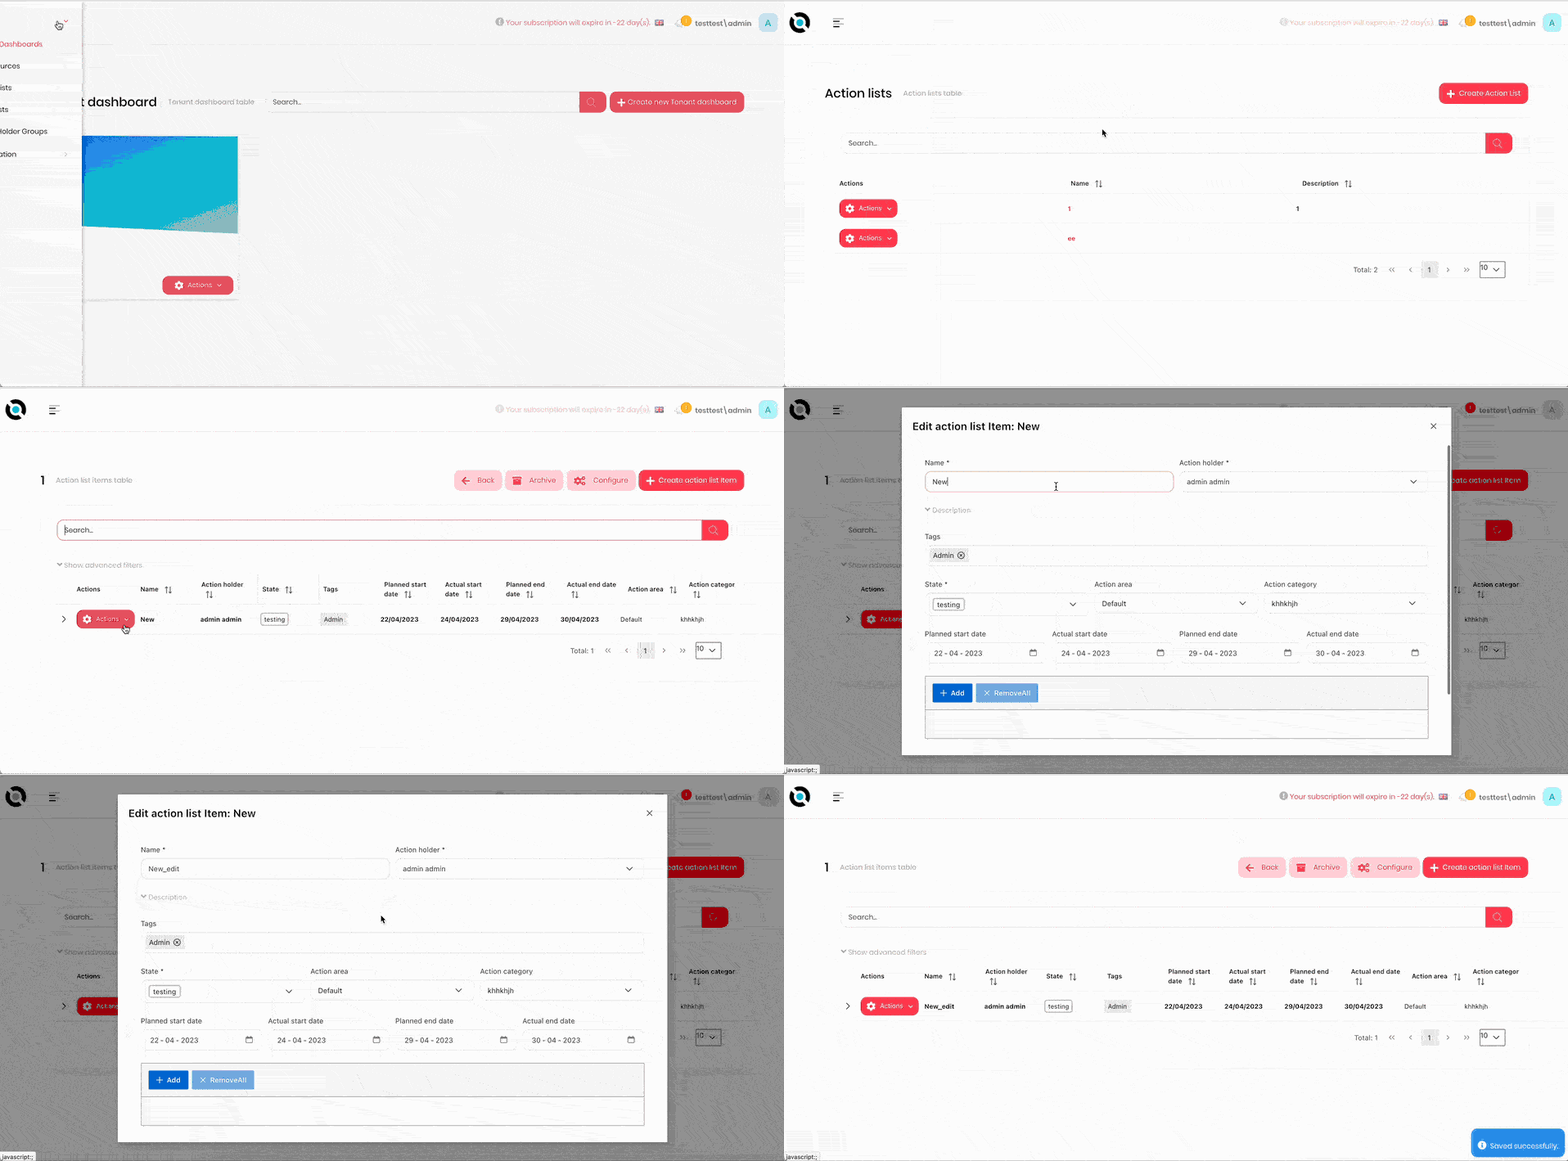
- Click the hamburger menu in the top-left corner.
- Select MDI > Action Lists.
- Select the action list.
- Click Actions next to the Action List Item you want to edit.
- Click Delete.
- Confirm deletion.